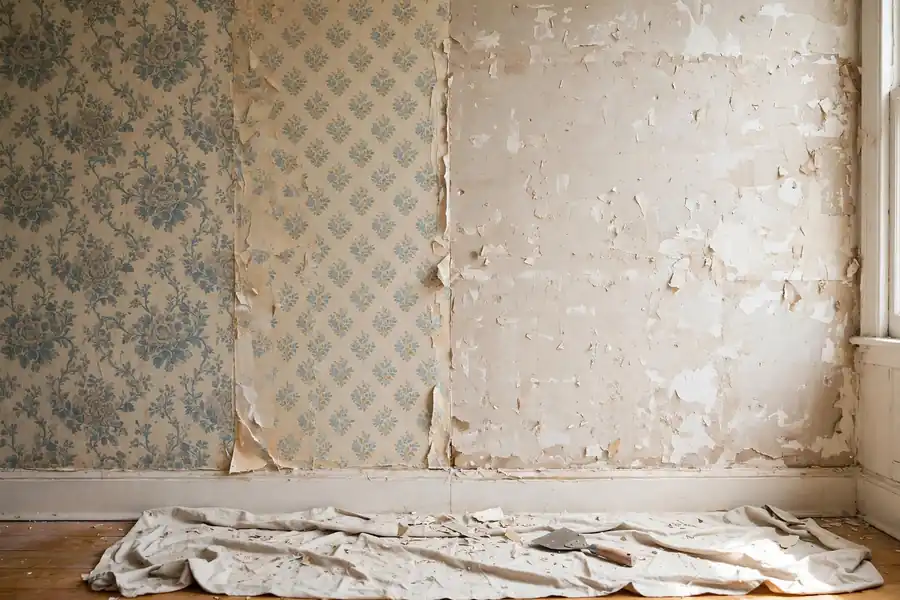
Old wallpaper comes off cleanly only when the method matches the paper and the wall. Learning how to remove wallpaper starts with a test patch: lift a corner, check for a peelable face, and learn whether you face strippable paper, vinyl, or paste locked under paint. That one test decides whether the job takes an afternoon or a weekend, and whether the wall survives without a skim coat. Work one wall at a time, keep the paper wet while you scrape, and never paint over paste.
Wallpaper removal at a glance
| Paper on the wall | First move | Method that fits | Watch out for |
|---|---|---|---|
| Strippable | Peel a corner dry | Dry peel, no water | Paste residue left after the sheet |
| Peel-and-stick | Warm a corner with a hair dryer | Heat, peel low and slow | Old adhesive pulling paint or drywall paper |
| Vinyl | Peel the face at a seam | Face off, soak the backing, scrape | The face blocks water, so the backing needs scoring |
| Pasted paper | Wet a test patch | Score, soak 15 minutes, scrape | Sections that dry out before you scrape |
| Painted paper | Score a test patch | Score, soak or steam, scrape | Paint blocks water, so dwell time runs long |
| Several layers | Count the layers at an edge | One layer at a time, soak or steam | Each layer hides its own paste |
What type of wallpaper is on the wall?
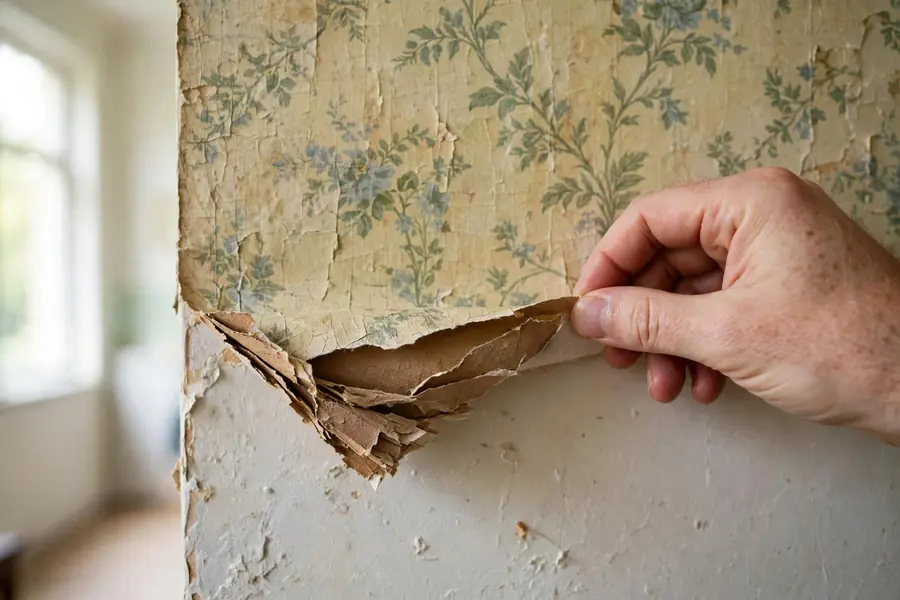
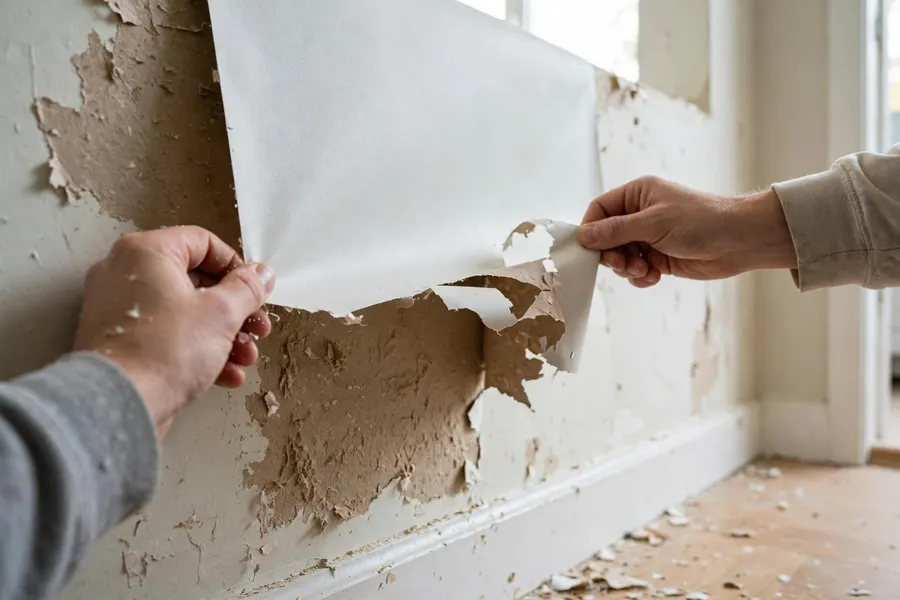
The paper tells you the method, so read it before you buy anything. Lift a bottom corner with a putty knife and pull slowly. A sheet that comes off whole and dry is strippable paper, and the job stays simple. A sheet that splits, with a printed face coming away and a plain backing staying on the wall, is pasted paper or vinyl with a paper backing. A face that stretches like plastic and refuses water is vinyl. Paint on the surface means painted paper, and the paint layer has to be broken before any liquid can reach the paste.
Count the layers at a switch plate or a door casing. Pull the plate, look at the cut edge, and count the lines of paper. Houses often carry two or three generations of paper, and each layer needs its own round of soaking. A test patch the size of a dinner plate, done with the method you plan to use on the whole room, tells you more than any label. If the patch fights you, change the method on the patch, not on the whole wall.
What tools do you need before you start?
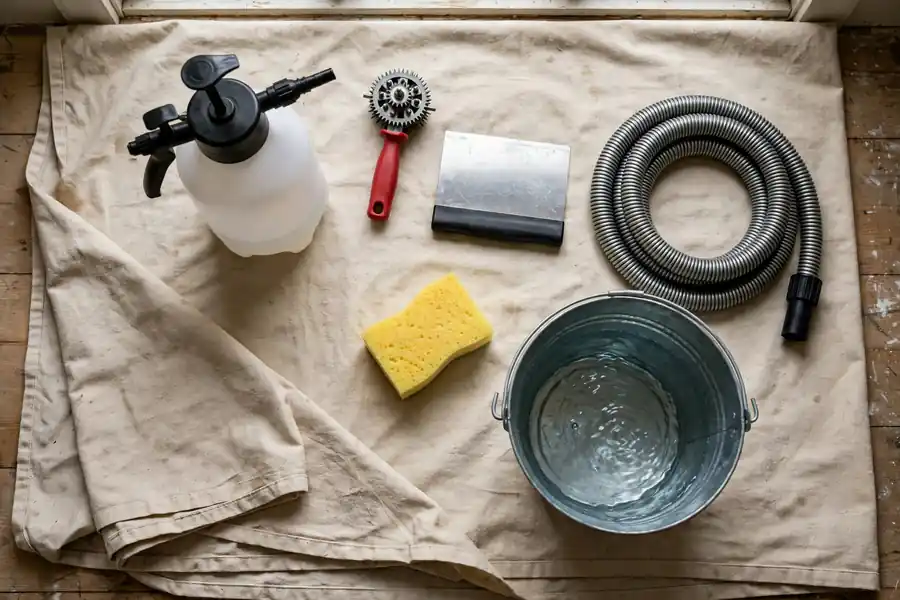
Buy the scraper last and the protection first, because water and paste go everywhere once the paper starts coming down. A pump sprayer beats a spray bottle on any wall bigger than a closet, since it lays down an even coat and keeps pressure up. Broad knives do the scraping: a 3 inch knife for edges and a 6 inch knife for open wall, kept nearly flat to the surface so the edge slides under paper instead of digging into the wall.
| Tool | Job it does |
|---|---|
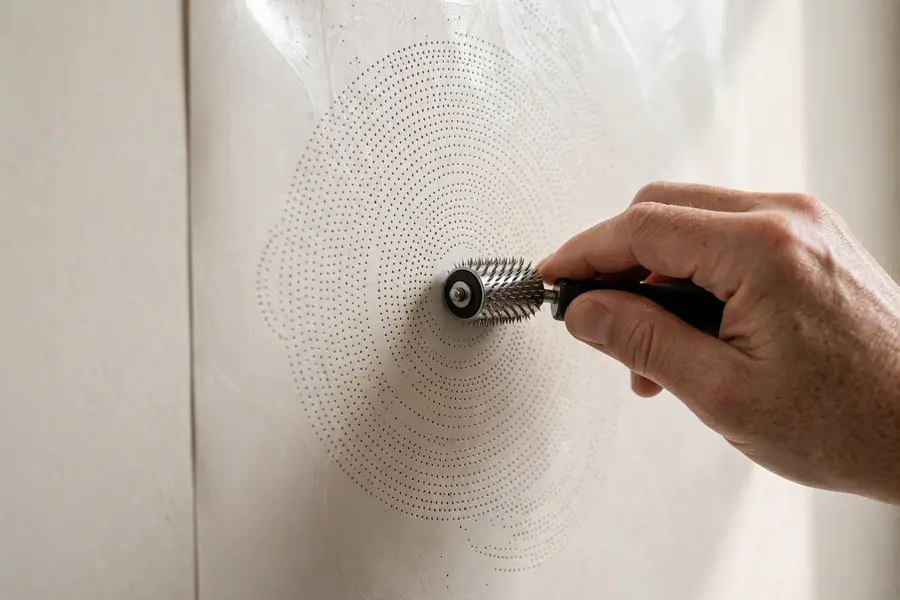
| Scoring tool | Punches pinholes so liquid reaches the paste |
| Pump sprayer | Lays hot water or remover down evenly |
| 3 inch and 6 inch broad knives | Scrape softened paper at a low angle |
| Wallpaper steamer | Heat and moisture for stubborn or painted paper |
| Hair dryer | Softens peel-and-stick adhesive |
| Drop cloths and painter's tape | Floors, trim, outlets, and switches |
| Bucket, sponges, and clean rags | Washing paste off the bare wall |
| Gloves and eye protection | Hot water, steam, and remover splash |
| Ladder | Ceilings and high walls, set on level floor |
Rent the steamer only after the soak method has failed on your test patch. Most rooms never need one, and a steamer adds burn risk and wall risk for no gain on paper that would have soaked off.
How do you protect the room and the power?
Water is the whole method, and water near live outlets is the one hazard that turns a messy job into a dangerous one. Switch off the breaker for the room, tape over outlets and switches with painter's tape, and remove switch plates and outlet covers so paper edges behind them come away cleanly. Keep the steamer and the sprayer off the same circuit habits: the breaker stays off for the whole wet phase, and power goes back on only when the walls are dry and the covers are back in place.
Move furniture to the center and cover it with plastic. Run a drop cloth along the baseboard and tape its top edge to the trim so drips land on plastic, not on the floor. Peeled paper makes a useful second drop cloth: lay the sheets face down as you go, then roll the whole mess up at the end. Keep a trash can lined and close, because wet paper tears into strips and a pile on the floor turns into a slipping hazard. Open a window for air movement, but close the room vents and switch off fans while remover is dwelling, since moving air dries the wall before the paste lets go. That last point comes from Roman's own plaster-wall guide, read October 27, 2026.
Should you score the wallpaper first?
Scoring helps only when liquid cannot reach the paste, and it hurts when the wall under the paper is soft. Score vinyl faces, painted paper, and any sheet that sheds water. Skip scoring on strippable paper that peels dry, on peel-and-stick, and on any wall where the test patch came off with soaking alone. Every hole you punch is a hole the remover uses, and on drywall those same holes can reach the wall's own paper face if you press hard.
Use a scoring tool with light pressure in a circular pass, one pass only. Roman's guide for plaster walls, read October 27, 2026, says the same: light pressure, circular motion, and a 2 foot square test area first. The Family Handyman's pro sources say the same about drywall: start gentle and add pressure only as needed, because too much pressure pokes holes in drywall. A utility knife does the same job at seams and edges, where a shallow cut along the seam lets liquid in without a field of holes. If the wall under the paper is unprimed drywall, do not score at all. The risk to the facing paper is greater than the gain, and gel remover on an unscored surface, given time, does the work instead.
How do you peel strippable wallpaper dry?
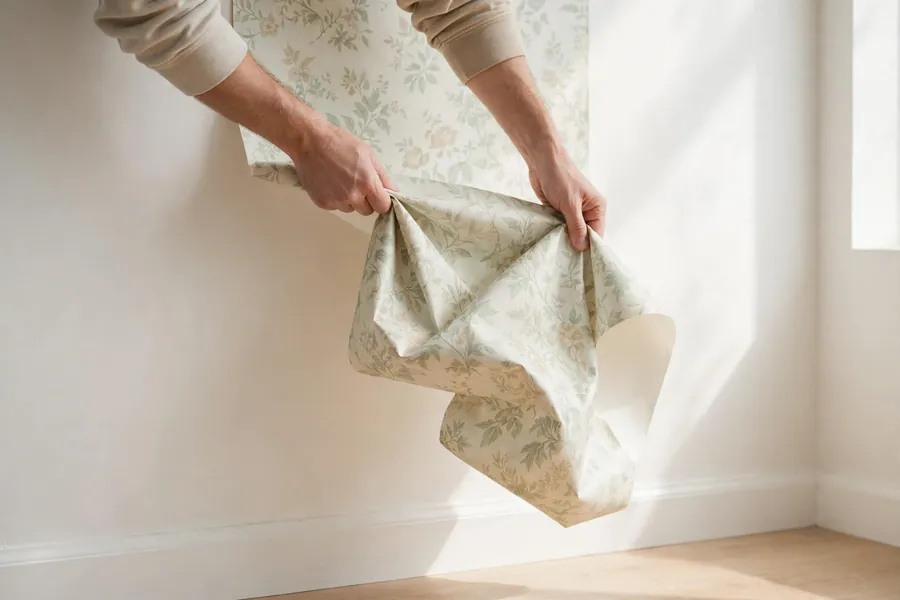
Strippable paper is the easy case, and the method is to trust it. Start at a bottom corner, lift the edge with a putty knife, and pull the sheet down and away at a low angle, close to the wall. Slow, steady tension peels more than speed does. Fast pulls snap the sheet and leave strips that then need soaking anyway. Work strip by strip, top to bottom, and drop each sheet onto the drop cloth.
The wall is not done when the last sheet lands. Strippable paper leaves paste behind more often than people expect, because the paste stayed on the wall while the face came away. Run a damp sponge over the bare wall: slick or tacky patches are paste, and they all have to come off before paint. The glue section later in this guide covers the wash. If a strip tears and the backing stays put, treat that patch as pasted paper and soak it rather than fighting it dry.
How to remove wallpaper without a steamer?
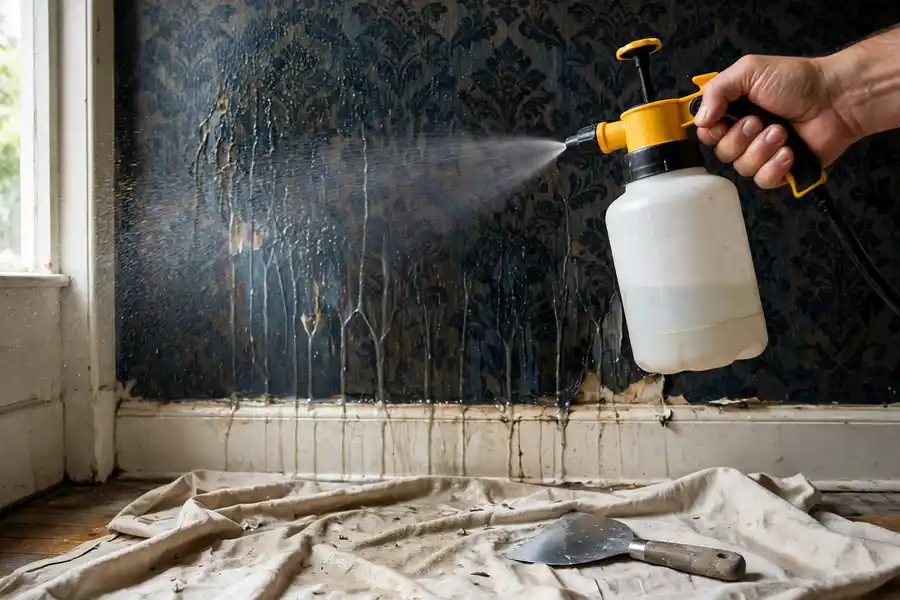
Most paper comes off with water, patience, and a remover, and the steamer stays in the rental shop. The order that works is: test patch, score only if the surface sheds water, soak a section, wait, scrape, and repeat. Work in sections about 3 feet wide so the wall stays wet from spray to scrape. A section that dries out before you reach it has to be sprayed again, and re-wetting costs more time than working small.
Soak with hot tap water first. Hot water softens starch and cellulose paste, which is what holds most older paper, and it costs nothing. Spray until the paper is dark and limp, wait 10 to 15 minutes, and keep the surface damp during the wait. Roman's guide gives the same 15 minute dwell for its gel remover, and 10 to 15 minutes for plaster walls, read October 27, 2026. Scrape with the broad knife nearly flat to the wall, pushing under the softened paper rather than chopping at it. If the paper resists, spray again and wait again instead of pressing harder. Force is what gouges walls.
| Solution | What it actually does | Honest verdict |
|---|---|---|
| Hot water | Softens starch and cellulose paste | The baseline. Try this first on every test patch. |
| Gel or liquid remover | Wetting agents and enzymes hold water on the wall and break paste down | Best for stubborn paste and big rooms. Follow the label dwell time. |
| Vinegar mix | Mild acid in hot water, acts as a wetting agent | No maker evidence it dissolves paste. The hot water does the work. |
| Fabric softener mix | Surfactant that helps water spread | Same limit as vinegar, and residue can sit under paint. Rinse hard if you use it. |
| Dish soap mix | Surfactant that helps water spread | Fine as a weak wetting agent. Keep the mix weak and rinse well. |
| Steamer | Heat and moisture together | Strongest option, highest wall risk and burn risk. Last resort. |
The folk mixes deserve a plain word, because they dominate search results. Vinegar, fabric softener, and dish soap all help water spread and stay wet, which is real but small. None of them dissolves paste the way an enzyme remover does, and no maker backs the softener or vinegar mixes with test data. The disagreement online runs exactly along that line: bloggers repeat the mixes because hot water works, and trade guidance credits the water. If you use a softener mix, rinse the wall twice, since softener residue can repel the primer that follows. A gel remover earns its price on stubborn paste because it clings to the wall instead of running down it, and it stays wet through the dwell time.
When is a steamer the right tool?
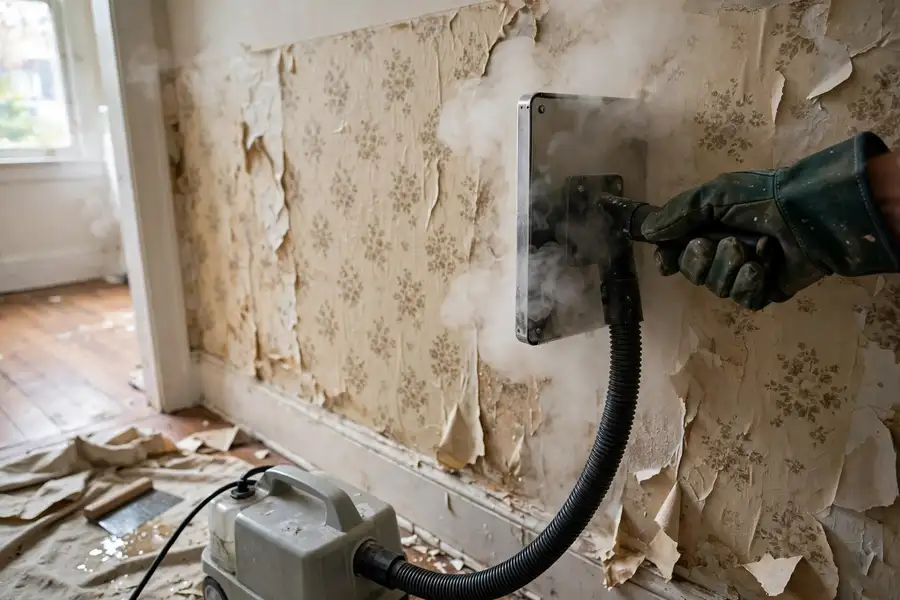
A steamer earns its place on painted paper, several layers, and paste that has hardened for decades. It is the last tool, not the first, and the trade press says the same: the Family Handyman's pro sources call the steamer the last line of defense, and warn that holding it on drywall too long damages the wall's paper face. On plaster, steam is safer and often faster. On drywall, use it only where soaking has failed, keep it moving, and stop the moment the paper loosens.
Fill the tank with clean water only, never with remover or cleaner. Wagner's manual for the 915 steamer, read October 27, 2026, says to use pure water without additives, to never switch the unit on empty, and to hold the steam plate flat against scored paper for 15 to 20 seconds before scraping. Wagner's own service page says a full container takes up to 12 minutes to make steam and runs about 85 minutes. Wear gloves and eye protection, since steam leaves the plate at boiling point, 212 degrees Fahrenheit, and scalds on contact. Never point the plate at yourself, at another person, or at an outlet. Before refilling, switch off, release pressure through the trigger, unplug, and let the water cool at least 20 minutes, per the Wagner manual. Work top to bottom, steam one section while you scrape the last, and keep the plate moving. A plate parked in one spot cooks the wall under it.
How do you remove peel-and-stick wallpaper?
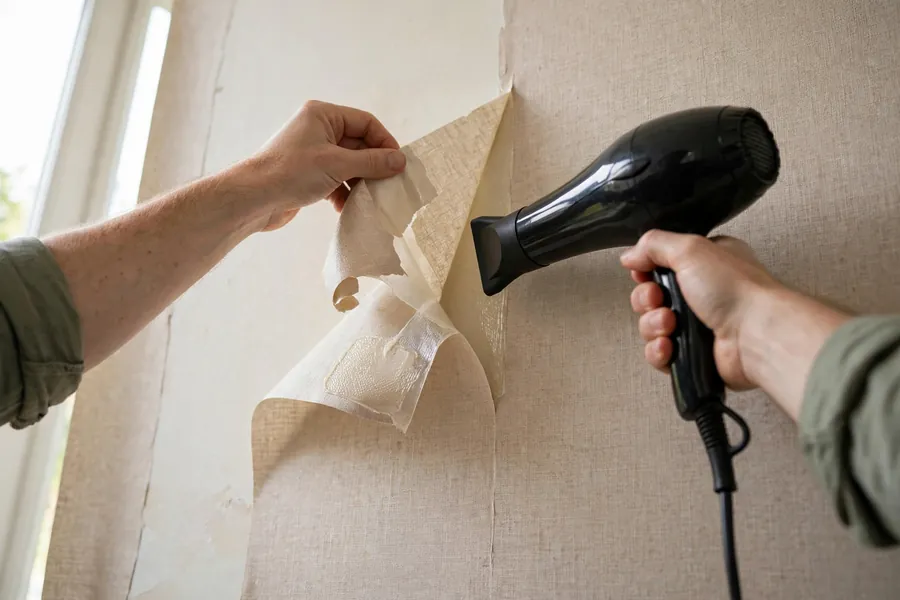
Peel-and-stick is a different adhesive, and water is the wrong tool for it. The bond is pressure sensitive, so heat softens it and a low pull angle releases it. Warm a corner with a hair dryer on a low setting for 10 to 15 seconds, lift the edge with a fingernail or a plastic card, and pull the panel back on itself at a shallow angle, close to the wall. The guidance from peel-and-stick makers and installers agrees on the angle: low and close to the wall, slow and steady. Pulling straight out loads the paint and the drywall paper, and that is how paint comes off with the panel.
Heat a section, peel it, then heat the next. A heat gun on its lowest setting works, but keep it moving and keep it inches away, since concentrated heat blisters paint. Fresh paper on well painted drywall usually comes away clean. Paper left up for years, paper on fresh paint, or paper on unprimed drywall can pull paint or tear the drywall face, and that damage is covered in the repair section later in this guide. Residue left behind wipes off with warm water and a little dish soap first; isopropyl alcohol on a cloth takes stubborn spots, tested on a hidden patch first so the paint underneath survives.
How do you remove vinyl wallpaper?
Vinyl comes off in two passes, and trying to do it in one is why people say vinyl is impossible. The vinyl face is a plastic skin that water cannot cross, so peel it first. Pick a seam, lift the face with a putty knife, and pull it away in sheets. The face usually comes off dry or nearly dry, and the wall behind it is a plain paper backing holding all the paste.
Score the backing lightly, one pass, since the backing is paper and takes water well. Spray hot water or gel remover over the backing, wait 10 to 15 minutes, and scrape at a low angle. The backing comes off in damp sheets when it is ready, and in shreds when it is not, so re-wet rather than force it. Vinyl over vinyl, where a second layer was hung on top of the first, repeats the same two passes for each layer. Wash the wall after the last backing is off, since vinyl paste is thick and leaves more residue than paper paste.
What do you do with painted-over wallpaper?
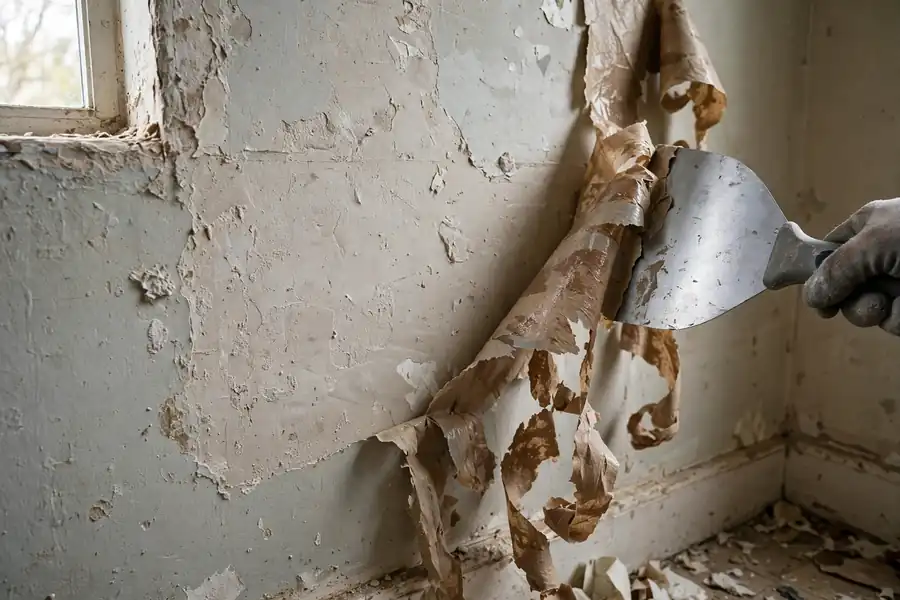
Painted paper is the hardest common case, because the paint coat seals the paste away from water. The fix is to break the seal, then give liquid time. Score the painted surface with light pressure, or cut shallow lines along the seams, so the remover has a way in. Then soak with gel remover or bring in the steamer. Dwell time runs longer than on unpainted paper, so keep the section wet and reapply rather than scraping early. A steamer often wins here, since heat and moisture push through the scored paint together.
Expect damage. Painted paper usually hides several layers, and each layer has to come off before the next can be soaked. The wall under painted paper is often unprimed, since the paper went up before anyone planned to paint, so the drywall cautions in this guide apply in full. If the paper is tight, flat, single layer, and the paint on it is sound, some painters leave it and paint over it, but that is a compromise: seams show, moisture gets trapped, and the next owner faces the same job. The repair section covers what to do when the top layer takes drywall paper with it.
What changes with old, textured, or grasscloth paper?
Age hardens paste and multiplies layers, so old paper needs longer dwell time and more rounds, not more force. Paper hung 20, 30, or 40 years ago often sits on unprimed drywall or old plaster, with paste that has set like cement. Soak longer, re-wet often, and accept that the job runs in rounds. Woodchip and heavily textured paper are thick, so they need scoring and a long soak or steam, and they come off in chunks rather than sheets. The texture holds water, which helps, but the thickness means the paste at the wall is the last part to soften.
Grasscloth and fabric paper need a dry-first approach. Natural fibers stain, shrink, and stretch when soaked, so try a dry peel on a test patch first and use as little water as the patch allows. If soaking is needed, use a gel remover that clings, work small sections, and stop if the fibers start to distort. Fabric-backed wallcovering peels the same way: pull the face dry where it allows, then deal with the backing wet. Multiple layers follow the same rule as painted paper: one layer at a time, and the bottom layer is usually the one glued hardest to the wall.
How do you remove wallpaper from drywall without tearing the wall?
Drywall is paper over gypsum, so every wet method is a negotiation with the wall's own paper face. The face softens when it stays wet, tears when a scraper digs in, and bubbles under joint compound when it is patched while damaged. Keep sections small, keep the knife nearly flat, and never let a section sit soaked while you work elsewhere. If the facing paper starts to fuzz or lift, stop wetting that patch, let it dry, and seal it before you patch it. The sealing step is in the repair section.
Unprimed drywall is the trap. Paper hung straight onto bare drywall bonds to the facing paper itself, and removal tears the face no matter how careful the method. Use as little water as the job allows, favor gel remover over floods of water, skip the steamer, and plan on sealing and skim coating. A wall that was primed or sized before papering releases far more cleanly, which is why the priming step at the end of this guide matters for the next owner. Sheetrock is the same material under a brand name, and the same rules apply.
What about plaster, wood, ceilings, and bathrooms?
Plaster takes water and steam better than drywall, but soft damp plaster gouges under a scraper held at a steep angle. Keep the blade low, work while the wall is damp rather than soaked through, and let the wall dry fully before you judge its condition. Old plaster can crumble at the surface when it stays wet, so small sections and a light hand matter here too.
| Surface | Water limit | Method that fits | Risk |
|---|---|---|---|
| Primed drywall | Moderate, small sections | Soak or steam with a light hand | Scoring too hard punches the facing paper |
| Unprimed drywall | Very little | Dry peel and gel, small sections, no steamer | Face tears and bubbles under patching |
| Plaster | Generous, small sections | Soak, steam, scrape at a low angle | Soft damp plaster gouges easily |
| Wood and paneling | Minimal | Heat and peel, light damp wipe | Soaking swells seams and lifts veneer |
| Ceiling | Small patches | Soak or steam overhead in patches | Falling water and paste, ladder work |
| Bathroom | Ventilate, check for mold first | Soak or steam after the mold check | Moisture trapped behind vinyl |
Wood and paneling need the least water of any surface. Heat softens the adhesive, a plastic scraper lifts the paper, and a barely damp cloth takes the residue. Flooding a paneled wall swells the seams and lifts veneer, and the damage shows after the wall dries. Test the finish in a hidden spot before any liquid goes on, since some finishes cloud with water or alcohol. Ceilings follow the same methods with gravity working against you: small patches, eye protection, and a ladder set on level floor with a spotter when the room allows. Bathroom paper is often vinyl over damp walls, so check for mold before you soak anything, as covered in the stop conditions section.
How do you get the glue off the wall?
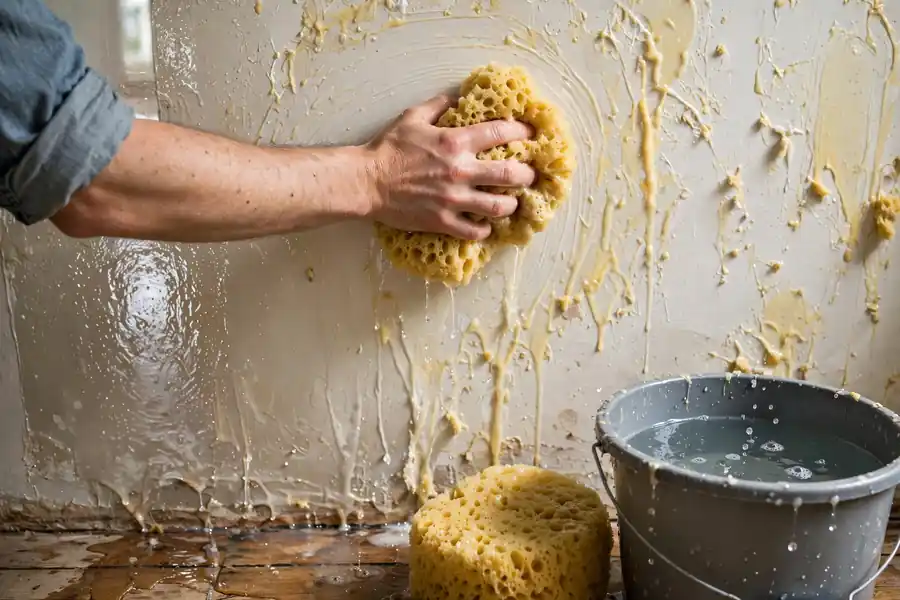
Paste left on the wall is the most common reason a new paint job fails, because paint over paste cracks and peels as the paste dries and shrinks. Washing is a separate job from stripping, and it needs its own pass. Sponge the bare wall with hot water and a little dish soap, working in sections, and wipe with clean water after. A second wash with clean water takes off the soap film and the last of the paste. Change the wash water often: dirty water spreads paste instead of lifting it.
Test the wall when it is dry. Run your hand over it. A clean wall feels matte and even, with no slick or tacky patches. Slick spots are paste, and they need another wash. A second test: flick a little water on the wall. On a clean wall it soaks in evenly; on paste it beads or sheets off in patches. Backing left on the wall, the thin paper layer under vinyl faces, washes off the same way, with soaking and a broad knife at a low angle. If paste will not wash out of a patch no matter how many passes you make, seal it instead of sanding it: a coat of Zinsser Gardz, a penetrating sealer made for sealing old adhesive and torn drywall paper, locks the residue down before primer. Zinsser's product data, read October 27, 2026, lists sealing old wallpaper adhesive as a named use, with a 30 minute touch dry time and a 3 hour recoat time.
How do you take a wallpaper border down?
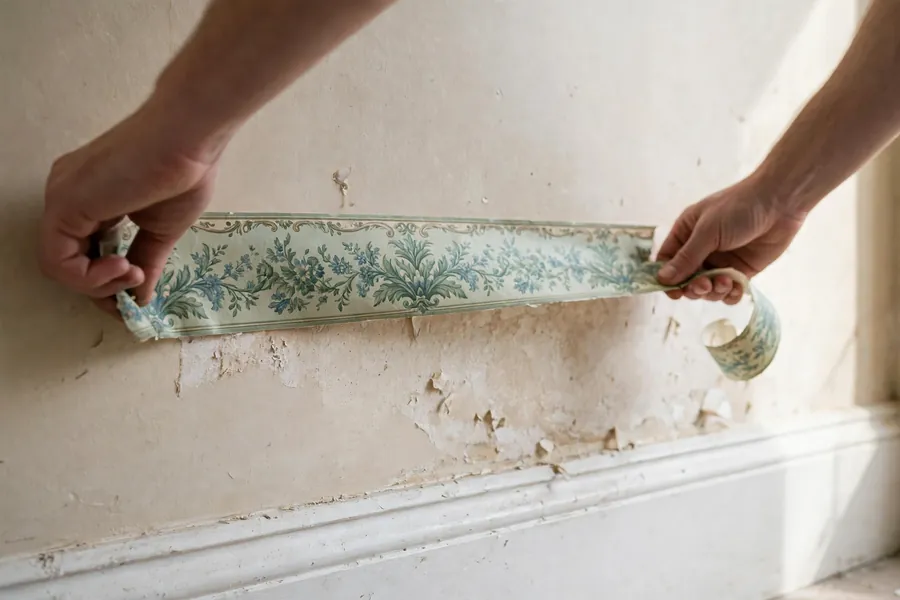
A border is a narrow strip, and the same rules apply at small scale. Lift a corner and test whether it peels dry. Borders hung with paste soak off with hot water or gel remover, sprayed along the strip and left to dwell 10 to 15 minutes. A hair dryer on a low setting softens borders hung with stronger adhesive and loosens the glue under a border that sits on painted wall, which is where the paint damage risk lives. Peel low and slow, close to the wall, and reheat rather than pull harder when the strip resists.
Old borders, including 20 year old borders, often sit on paint that has yellowed around them, so the wall under the border is a different color from the wall beside it. That is a paint problem, not a removal problem, and primer plus two coats of paint evens it out. Border glue on a painted wall washes off with hot water and a sponge, and a border removed without damaging the paint underneath still needs the glue washed off before repainting, or the new paint fails along the old border line. A border over wallpaper comes off with the same soak method, but work the strip only, and keep water off the paper you plan to keep.
How do you repair the wall after the paper is off?
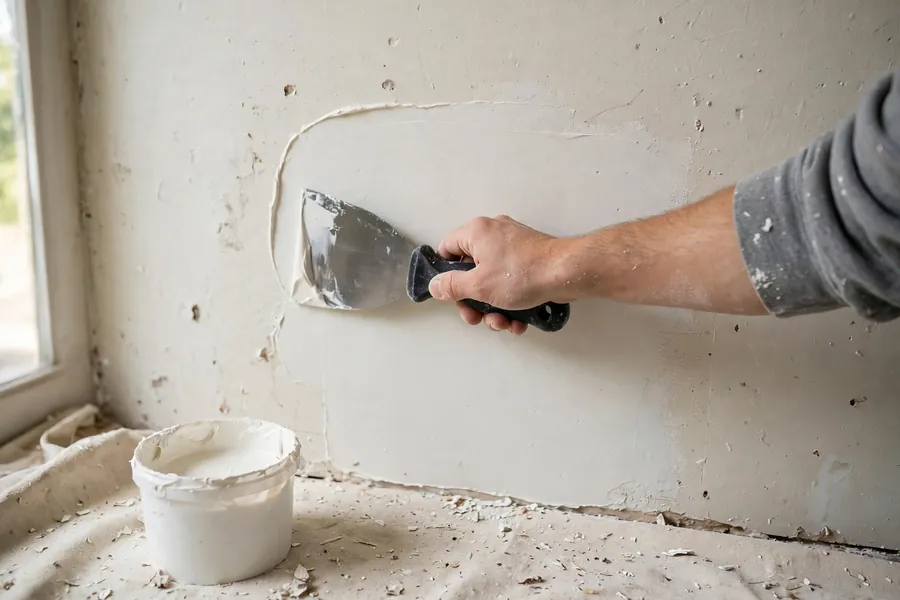
Every removal leaves some damage, and the repair order matters: seal torn paper first, patch second, sand third, prime last. Gouges from the scraper and tears in the drywall facing paper need a penetrating sealer before joint compound goes on, because compound spread over torn, fuzzy paper bubbles as it dries. Zinsser Gardz is the product made for this: it soaks into torn facing paper and dries to a hard film, and Zinsser's data lists repairing torn paper on damaged drywall as its first named use. One coat is enough on most surfaces, per the same product data. Let it dry, then spread a thin coat of joint compound with a 6 inch knife, feathering the edges so the patch melts into the wall.
Sand with 120 grit paper on a hand sander once the compound is dry, wipe the dust off with a damp cloth, and look at the wall in raking light from a lamp held at an angle. Raking light shows every ridge and hollow that flat light hides. Deep gouges take two thin coats of compound rather than one thick one, since thick coats shrink and crack. Plaster cracks get the same treatment with patching plaster or joint compound, and crumbling plaster that moves when pressed is a pro job, not a patch. Let everything dry fully before priming: compound that looks dry on top can hold moisture underneath, and primer over damp compound peels.
How do you prep the wall for paint?
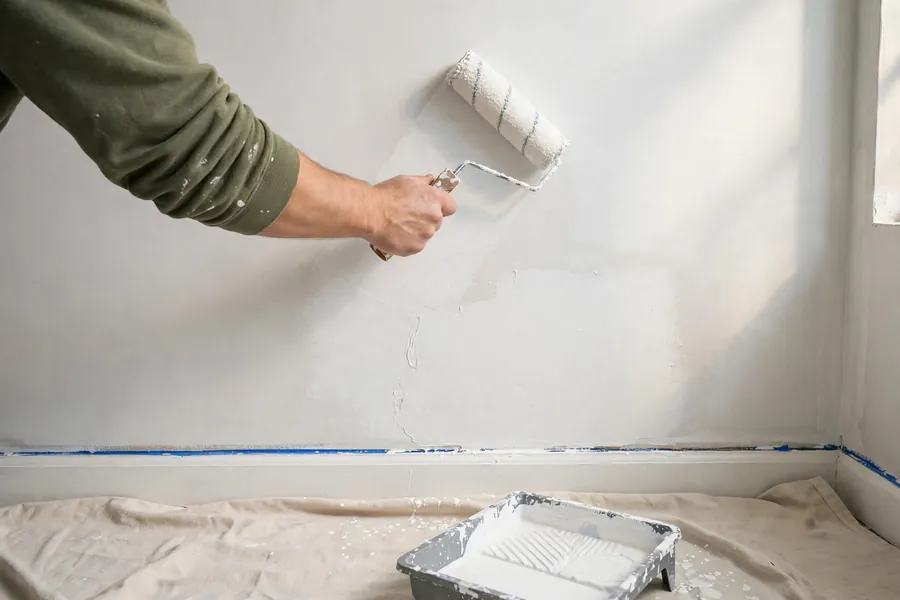
Paint goes on only when the wall is clean, dry, smooth, and sealed. Wash the wall once more after sanding, since sanding dust and paste residue both sit on the surface, and let the wall dry a full day after the last wash. Damp walls hold paint badly, and a wall that feels dry to the hand can still hold moisture from days of soaking. A moisture meter settles the question on a wall that stayed wet for days, but time and air movement settle it on most jobs: open windows, run a fan, and wait.
Prime with a sealer made for the job, not with leftover wall paint. Walls that carried wallpaper need a primer that blocks paste stains and evens out patched and unpatched areas, and a shellac or oil based primer earns its place where paste stains show through. Gardz goes under the primer on torn or damaged drywall, as covered in the repair section. Two finish coats follow the primer, with the first coat cut in at edges and rolled in the field. The prep sequence, step by step: strip, wash, dry, seal torn paper, patch, sand, wash again, dry, prime, paint. Skipping the second wash or the primer is how paste ghosts show through a new paint job months later.
When do you stop and call a pro?
Some conditions end the DIY job on the spot, and they are rules, not suggestions. Stop and get help when any of these appear.
Mold on or behind the paper means the wall has a moisture problem, not a cleaning problem. The EPA's mold guidance, read October 27, 2026, says to fix the water source first, to dry wet materials within 24 to 48 hours, and to keep indoor humidity below 60 percent, ideally 30 to 50 percent. A moldy patch under about 10 square feet is one a homeowner can in most cases handle, per the same guidance, with gloves, eye protection, and a mask. Larger growth, growth inside the wall, sewage water, or anyone in the home with asthma or a mold allergy means a pro. Never paint or caulk over mold, and never run the heating and cooling system when mold contamination is suspected, since that spreads spores through the house.
Asbestos is the second stop rule. Some vinyl wallcoverings and old pastes from the mid 20th century contain asbestos, and the EPA says plainly that you cannot tell whether a material contains asbestos by looking at it, that if in doubt you should treat it as if it contains asbestos and leave it alone, and that taking samples yourself is not recommended. A trained and accredited asbestos professional takes the sample and a lab reads it. Do not sand, scrape, or drill suspect material until the result comes back, and check your state rules, since some states require a survey before renovation work.
Lead is the third stop rule. Homes built before 1978 often carry lead paint under or over wallpaper, and the EPA Renovation, Repair, and Painting rule covers paid work that disturbs more than 6 square feet of interior painted surface per room, or 20 square feet outside, with window replacement and demolition always covered. Hired firms must be EPA certified and follow lead-safe practices. A homeowner working on their own home is exempt from the rule, but the hazard is the same, so test with an EPA recognized kit before sanding or scraping painted layers, and hire a certified firm when the test is positive or when the work is large. Ceilings, walls that crumble under the scraper, and rooms where the paper covers damage you cannot see are all pro territory. So is any job where the ladder work feels unsafe: high stairwell walls and two story entries belong to a crew with the right equipment.
How hard is it, how long does it take, and what does it cost?
Difficulty follows the paper, not the room. Strippable paper on primed drywall is the easiest wall job in a house. Vinyl, painted paper, and several layers on unprimed drywall are among the hardest, and they are the jobs where a pro earns the fee. The table below gives planning bands, not promises: room size, layer count, and wall condition move every job up or down the band.
| Scope | Time band | Pro cost band |
|---|---|---|
| One accent wall, strippable | An afternoon | Materials only for DIY; a small pro minimum |
| One room, one layer pasted | A weekend | Within the Angi range below |
| One room, vinyl or several layers | A weekend plus a day | Upper end of the Angi range |
| Whole house or painted paper | Several days, room by room | Written quotes; repairs add to the bill |
Angi's cost page, updated September 29, 2026 and based on 1,900 verified projects, puts professional removal at an average of $793, with most homeowners paying $423 to $1,192, or roughly $0.60 to $3 per square foot. Wall repairs after removal add $150 to $1,000 to the bill, per the same page. DIY costs are materials only: remover, knives, drop cloths, compound, sealer, and primer, plus a steamer rental on the jobs that need one. Prices vary by region and by room, so get two or three written quotes for pro work, with removal, repair, and priming listed as separate lines. A quote that skips repair and priming is not cheaper; it leaves the two steps that decide how the paint looks.
Hire a pro when the paper is painted over, when layers stack up, when the wall is unprimed drywall, when mold, asbestos, or lead is in play, or when the room is a stairwell or an entry with high walls. Do it yourself when the test patch peels or soaks off cleanly, the wall is primed drywall or sound plaster, and the room is one you can finish in a weekend. Either way, the test patch decides: it is the cheapest hour in the whole job.
Start with the test patch, not the whole wall
A room of wallpaper looks like a weekend of scraping, and it is, but the order decides whether the weekend ends with paint or with a skim coat. That is how to remove wallpaper and end with a wall ready for paint: test first, match the method to the paper, get the glue off, and seal the damage before the primer goes on. The wall under the paper has been waiting years for its turn. Give it the test patch, the right dwell time, and a clean wash, and it will take paint like a wall that never had paper on it.
Quick answers to common questions
Can you paint over wallpaper instead of removing it?
Paint over paper only when the paper is a single layer, tight everywhere, flat, and unpainted vinyl free, and even then it is a compromise. Seams show through, moisture gets trapped, and the next owner faces removal anyway. Removal is the right call in every other case.
Does fabric softener remove wallpaper?
No, not on its own. Fabric softener is a surfactant that helps hot water spread and stay wet, and the hot water does the softening. No maker backs the softener mix, and the residue can sit under primer, so rinse twice if you use it. Plain hot water or a purpose made remover does the same job without the residue.
Will a steamer damage drywall?
It can, when the plate sits in one spot too long or the wall is unprimed drywall. Steam softens the wall's own paper face along with the paste. Keep the plate moving, hold it 15 to 20 seconds per spot per Wagner's manual, and use soaking instead wherever soaking works.
How do you know all the glue is off the wall?
The wall tells you when it is dry. A clean wall feels matte and even, with no slick or tacky patches, and flicked water soaks in evenly instead of beading. Slick spots get another wash. If a patch will not wash clean, seal it with a penetrating sealer before priming.
How long should you wait before painting after removing wallpaper?
Wait until the wall is fully dry after the last wash, which is at least a full day with air movement on most jobs, longer on walls that stayed wet for days. Patching compound must be dry and sanded, sealer and primer must cure per their labels, and the wall must pass the hand test for paste before the first finish coat.