Replastering a wall means taking failed plaster off, preparing the base underneath, and building new coats back to a flat, hard finish. This guide covers how to replaster a wall from the first tap test to the mist coat, so the new surface bonds, stays flat, and takes paint without peeling.
| Job | When it fits | First move |
|---|---|---|
| Full replaster | Plaster is hollow, soft, or damp damaged across most of the wall | Strip back to the base and rebuild all coats |
| Partial replaster | Damage is local, the rest of the plaster is sound and bonded | Cut back to sound plaster and rebuild the section |
| Skim coat | Plaster is sound but the surface is rough, marked, or uneven by a few millimeters | One thin finish coat over the whole wall |
| Patch | A dent, nail hole, or small crack in otherwise sound plaster | Fill with joint compound, sand, and spot prime |
| Drywall replacement | The base is wrecked, out of level, or the wall needs new services run inside it | Remove plaster and lath, hang new board, and finish it |
When does a wall need replastering, and when does it not?
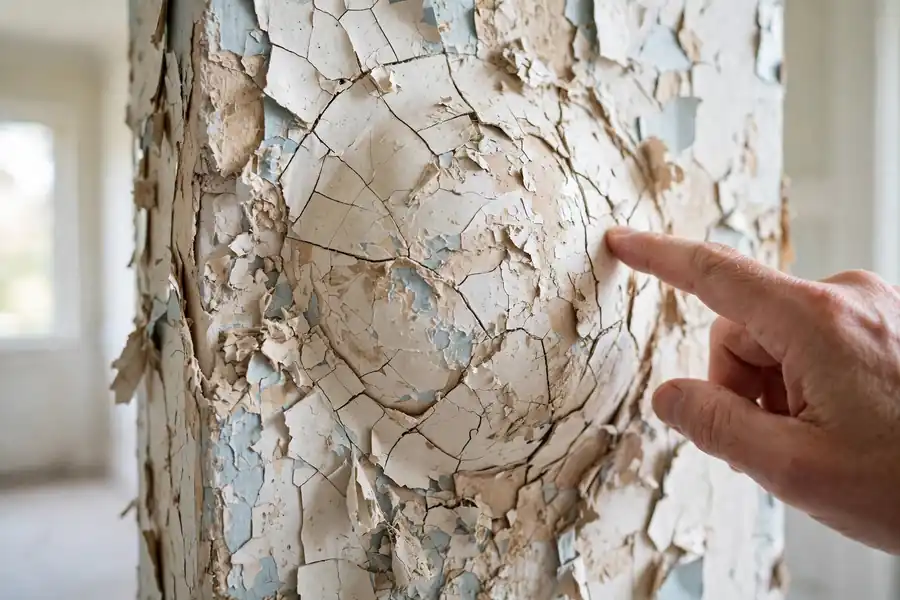
A wall needs new plaster when the plaster itself has failed. The clearest sign is a hollow sound when you tap it. Sound plaster rings solid. Blown plaster, where the keys that grip the lath have broken, gives a dull drum sound and often moves slightly under your hand. Other signs are plaster that crumbles or feels soft when pressed, a surface that powders when you rub it, and cracks that run in a map pattern with the plaster lifting between them.
| Symptom | Likely cause | Right response |
|---|---|---|
| Hollow drum sound over a large area | Broken keys or lost bond to the base | Replaster the affected area or the whole wall |
| Fine hairline cracks, surface solid | Shrinkage or minor movement | Skim coat or patch, after checking the crack is not growing |
| One crack that keeps reopening | Movement in the building, a lintel, or a fixing point | Find the cause before any plaster work; a plasterer or surveyor may be needed |
| Soft, dark, or salt stained plaster | Damp from a leak, failed gutter, or rising damp | Fix the moisture source first, then replaster |
| Bumps, trowel marks, or old repairs | Poor previous work on sound plaster | Skim coat, not a full replaster |
| Paint peeling in sheets | Weak bond between paint and plaster, or moisture pushing from behind | Strip the loose paint, test for damp, then skim or replaster |
Do not replaster a wall that only needs a skim coat. New coats add weight and thickness, and they move every door frame, socket, and skirting line they meet. Do not skim a wall whose plaster is blown. A thin finish coat over a hollow base will crack along the same lines and take the new work with it.
How do you test a wall before you strip it?
Tap the whole wall with your knuckles, in a grid, and mark every hollow area with a pencil line. Hollow patches often run further than the visible damage, so mark the full extent before you decide how much to strip. Press the surface with your thumb. Sound plaster feels hard and does not give. Plaster that dents or powders is past saving.
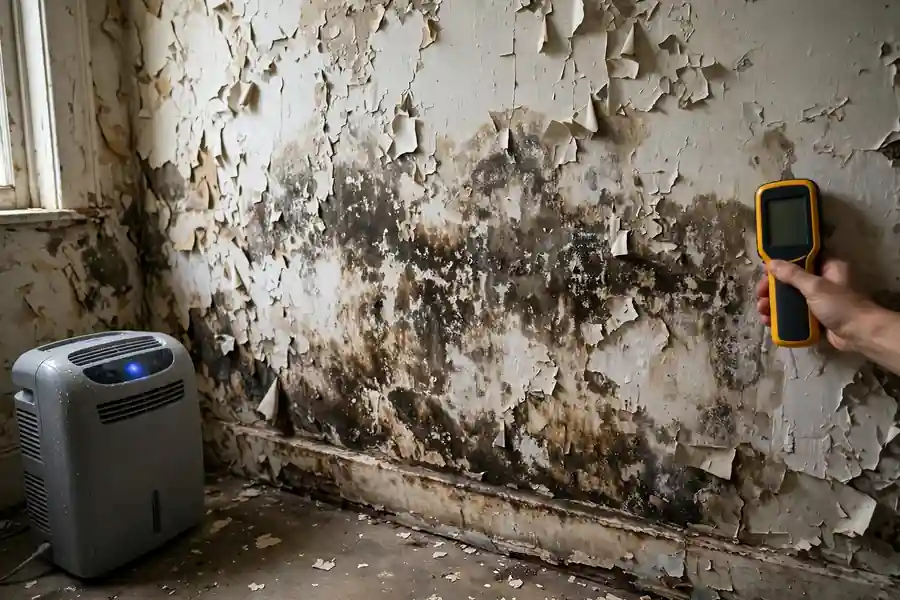
Check for damp before you plan anything. A moisture meter gives a reading, but your eyes and nose tell you as much: dark staining, tide marks, salt crystals on the surface, and a musty smell all point to water. Where damp is present, find the source first. Replastering over a damp wall traps the water and the new plaster fails in the same place.
Look at the cracks. Measure the widest point and note whether the crack runs diagonally from a door or window corner, which can signal movement. A crack that is wider at one end, or one that has opened again after a previous repair, needs a structural opinion before you plaster. Do not fill a live crack and hope it stays shut.
Test for lead and asbestos in any home built before 1978, before you disturb the plaster or the paint on it. The US EPA Renovation, Repair, and Painting (RRP) Rule requires firms doing paid work that disturbs paint in pre-1978 homes to be EPA certified, with a certified renovator on the job, and the rule applies to work that disturbs more than 6 square feet of painted surface in a room, to all window replacements, and to all demolition. Lead-safe work practices, containment, and cleaning are mandatory under the rule, and the EPA guidance on the rule was read October 27, 2026. Lead test kits recognized by the EPA give a fast answer on paint, but a lab test is more certain. Asbestos hides in old plaster, textured finishes, and joint compounds, and the EPA position is that you cannot tell by looking: if you suspect it, treat it as if it contains asbestos, leave it alone, and have a trained and accredited professional sample it. The EPA asbestos guidance was read October 27, 2026. A positive result for either material changes the job from a DIY strip to a controlled removal or a pro job.
Should you replaster over old plaster or strip it back?
Strip the plaster back when it is hollow, soft, damp damaged, or carrying more than one failed layer already. Each new coat adds weight to a bond that is already weak, and the failure returns faster each time. Strip back to a base you can trust: sound lath, sound masonry, or sound board.
Plaster over old plaster only when the old coat is hard, flat, firmly bonded, and dry. Even then, the old surface needs preparation. Cut out any hollow spots first, wash off dust and grease, and use a bonding agent made for the job. A coat laid over a dusty or glossy surface will not bond, and the new plaster will sound hollow within months.
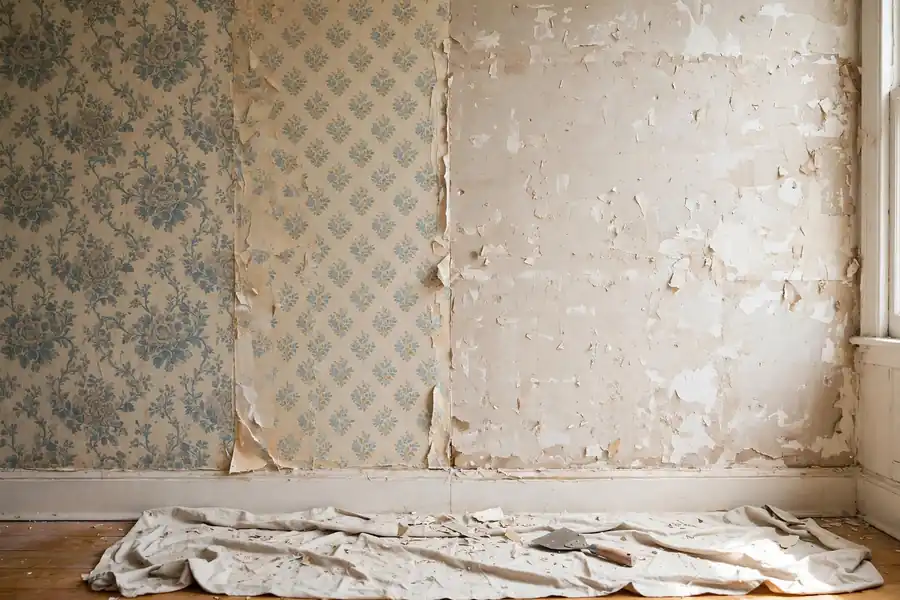
Never plaster over wallpaper, loose paint, or an actively damp wall. Wallpaper soaks and lifts under wet plaster. Loose paint comes away and takes the new coat with it. Damp keeps the plaster soft and feeds mold behind the finish. Wallpaper removal is a separate job with its own steps; this guide starts where the wall is bare and ready for plaster.
What tools and materials do you need?
| Item | What it does |
|---|---|
| Club hammer and cold chisel or bolster | Breaks failed plaster off the base in controlled pieces |
| Utility knife and straightedge | Cuts clean lines at the edge of the area to be stripped |
| Wire brush and stiff hand brush | Clears dust, loose material, and salts from the base |
| Mixing bucket, paddle mixer, and heavy duty drill | Mixes plaster lump free; USG specifies a cage type paddle at 900 to 1,000 rpm |
| Hawk and plastering trowel | Carries plaster and lays it on the wall |
| Straightedge or darby, 4 feet or longer | Rules the base coat flat and finds high and low spots |
| Feather edge and spirit level | Checks the wall for level and plumb as you rule |
| Corner trowel and internal angle tool | Forms clean internal corners |
| Spray bottle | Damps the base before plastering and keeps the trowel clean |
| Mesh tape, scrim, and metal corner beads | Bridges joints and protects external corners |
| Bonding agent | Gives new plaster a grip on smooth or painted surfaces |
| Dust sheets, masking tape, and a HEPA vacuum | Protects the room and clears fine dust |
Buy plaster in bags sized to the wall, and mix only what you can lay in the working time. A 50 pound bag of veneer finish plaster mixed at 7 to 8 quarts of water covers a modest wall, and the exact coverage is on the bag label. Read the label before you buy, because coverage, water ratio, and set time vary by product.
How do you remove failed plaster without wrecking what stays?
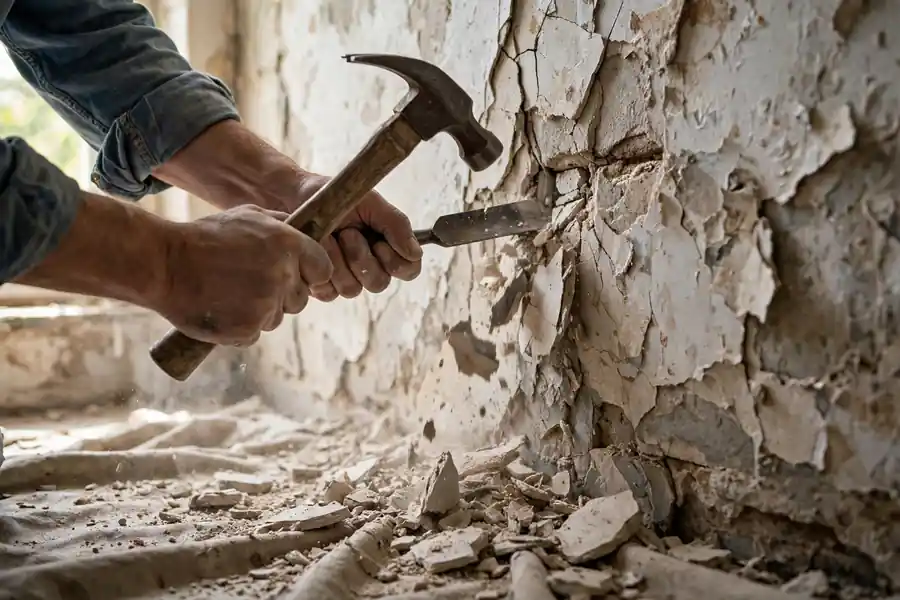
Cut the boundary first. Score a straight line through the plaster at the edge of the damaged area with a utility knife, then deepen it with a chisel. A clean edge stops the break running into sound plaster and gives the new coat a straight joint to meet. Work from the top of the damaged area downward, and take the plaster off in pieces rather than smashing it.
Protect what stays. Cover floors and fittings with dust sheets, tape plastic over doorways, and switch off power to any outlets or switches in the wall. Plaster dust is fine and travels. A HEPA vacuum at the end of the strip, and again before you plaster, keeps the bond clean.
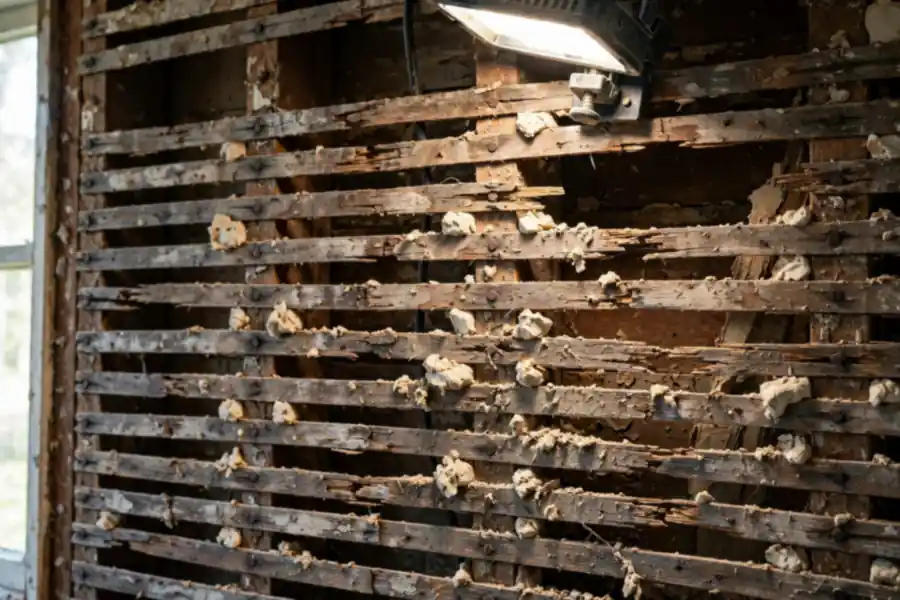
On wood lath, pry gently. Old lath is brittle, and a heavy blow snaps slats that could have held the new keys. Where lath is rotten, split, or missing, cut it back to the nearest stud and fit new lath. USG guidance for wood lath repair, read October 27, 2026, is to remove the old plaster down to the lath, staple metal lath over the wood lath, and build the new coats on that. Keep the keys. The scratch coat must squeeze through the gaps in the lath and curl behind it; without those keys, the plaster has nothing to hang from.
Bag the debris as you go. Wet plaster dust in a skip or bin sets hard and sticks. Dry plaster dust in a vacuum bag can do the same to the filter. Keep the waste dry and out of drains.
How do you prepare each surface for new plaster?
The base decides the prep. Plaster fails when the base is dusty, glossy, dry, or moving, so preparation is the work that makes the plastering easy.
| Base | Preparation |
|---|---|
| Wood lath | Replace broken slats, staple metal lath over sound wood lath, and check the lath is fixed tight to the studs |
| Metal lath | Fix it tight with no spring, lap joints by at least 2 inches, and keep it clean and dry |
| Brick and block | Rake out loose mortar, brush off dust, dampen the surface so it does not suck the water out of the plaster, and repair soft or missing mortar first |
| Drywall and veneer base | Tape all joints with the tape the system specifies, fill corner beads with the same plaster, and keep the face paper dry and intact |
| Sound old plaster | Cut out hollow spots, wash off dust and grease, and apply a bonding agent |
| Concrete | Remove form oil, laitance, and dust, and use a bonding agent where the surface is smooth or dense |
Dampen absorbent bases with a spray bottle just before you plaster. A dry brick wall pulls water out of the first coat so fast that the plaster stiffens before you can rule it. Do not soak the wall. The surface should look damp, not wet, with no water running.
Check the wall for level before you mix anything. Hold a straightedge against the base in several places and note the gaps. A wall that is out of level by more than the finish coat can hide needs the base coat built out, or the base itself fixed. Finding this after the plaster is on means either a wavy wall or a second coat you did not plan for.
Can you plaster over paint?
Yes, when the paint is sound, and no, when it is not. Paint that is firmly stuck, flat, and clean can take a new coat with the right preparation. Paint that peels, flakes, or bubbles comes off first, because the plaster will bond to the paint and the paint will then leave the wall.
Sand or scuff gloss and satin paint. Plaster needs a mechanical key, and a slick paint film gives it none. Wash the wall to remove grease and dust, then let it dry. Apply a plaster bonding agent, the gritty type sold for plastering over paint and smooth surfaces, and lay the plaster while the agent is tacky or as the label directs. Some plasterers use a PVA wash instead: a first coat of diluted PVA to seal the surface, dried, then a second coat applied tacky. Sources disagree on PVA over paint. Trade guidance notes that PVA primers are made to penetrate porous surfaces and can fail on a sealed paint film, where a purpose made bonding primer grips by adhesion instead. The safer choice on gloss or unknown paint is a gritty bonding agent rated for the job, not a plain PVA wash.
Test a patch first. Lay a small area, let it set and dry, and try to lift an edge. If the plaster peels off with the paint, the paint has to come off too. A failed test patch costs an hour. A failed wall costs the whole job.
Which plaster system fits your wall?
The wall type and the base pick the system. Gypsum plaster sets fast and finishes smooth, which suits most interior walls. Lime plaster stays breathable and flexible, which suits old solid masonry. Veneer plaster is a thin, hard finish over a special base board. Picking the wrong one is the most common reason a replaster fails early.
| System | Where it fits | Finish thickness | Ready to paint |
|---|---|---|---|
| Veneer plaster over veneer base | New drywall work and reboarded walls, interior only | 1/16 to 3/32 inch | About 24 hours to dry, then a latex breather type paint, per USG |
| Conventional three coat gypsum | Lath walls and masonry, where a thick build is needed | Scratch and brown coats built to level, thin finish coat | About 30 days cure before painting, as a planning allowance |
| Lime plaster on masonry | Old solid brick or stone walls, especially pre-1919 construction | Built in coats, each left to carbonate before the next | Weeks to months, depending on thickness and weather |
| Skim coat over sound plaster | Sound plaster that needs a new surface, not a new wall | 2 to 3 mm finish coat | 3 to 5 days drying for a skim, per trade guidance |
Veneer plaster, such as USG Imperial Veneer Finish, is applied directly over USG Imperial Gypsum Base in 1/16 inch to 3/32 inch thicknesses, dries in as little as 24 hours under normal conditions, and is generally ready for next day decoration with a latex base breather type paint, according to the USG product page read October 27, 2026. USG also states that PVA paints are not recommended over veneer finish. Corner beads set the thickness: bead grounds are 1/16 inch for a one coat system and 3/32 inch for a two coat system.
Conventional gypsum basecoat plaster, such as USG Structo-Lite, is a mill mixed perlite aggregate gypsum plaster that needs only water added, weighs about half as much as a sanded basecoat, and is applied by hand or machine over gypsum or metal lath, clay tile, concrete, and cinder block, according to the USG Structo-Lite product page read October 27, 2026. USG guidance for the same product says stud spacing should not exceed 16 inches on center, and that veneer plaster over the base must be completely dry before painting, checked with a 12 inch by 12 inch plastic sheet taped to the wall for 24 hours. The same USG guidance says concrete block must cure 45 to 60 days before veneer plaster is applied. Lime plaster is a different material with different rules, and the two must not be mixed up.
Sources disagree on gypsum versus lime for old masonry. Heritage guidance says solid walled houses built before 1919 need lime because it lets moisture move through the wall, and that gypsum and cement trap moisture and can push damp higher up the wall. Other trade sources report gypsum used successfully on old brick where the wall is dry and the exterior is sound. The deciding factor is moisture. Where a wall takes in water or shows salts, lime is the safe choice. Where the wall is dry, the exterior sheds water well, and the existing plaster is gypsum, matching gypsum is reasonable. If the house is listed or in a conservation area, check the rules before you choose.
How thick should each coat be?
Thickness is set by the system, not by guesswork. The scratch coat exists to grip the base. On lath it must be pressed through the gaps so it curls behind and forms keys. On masonry it keys into the joints and the rough surface. Score the scratch coat with a scratcher or a notched trowel while it is still soft, so the next coat has something to grip. The scratch coat hardens in 12 to 24 hours, according to Fine Homebuilding guidance read October 27, 2026, and the brown coat goes on after that.
The brown coat brings the wall to level. This is the coat you rule with the straightedge, and it takes the time. Fill the low spots, cut the high spots, and check with the straightedge in several directions. A wall that reads flat at the brown coat stage finishes flat. A wall that is wavy at this stage stays wavy, because the finish coat is too thin to correct it.
The finish coat is thin. Veneer finish runs 1/16 to 3/32 inch. A skim finish over a sound base runs 2 to 3 mm. Laying a finish coat thick to hide a bad base coat is the classic mistake. Thick finish coats shrink, crack, and slide, and they take far longer to dry.
How do you mix plaster so it does not set in the bucket?
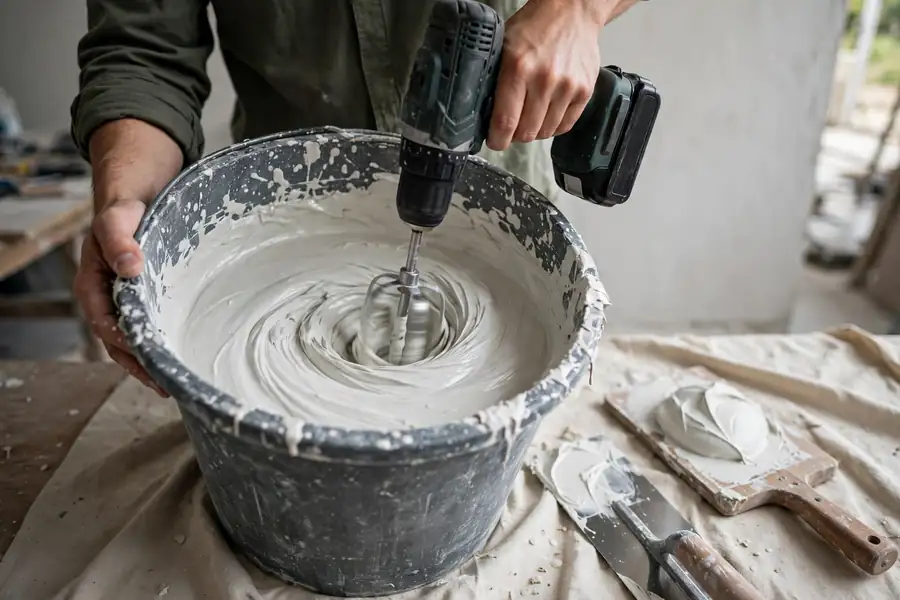
Put the water in the bucket first, then add the plaster slowly while the paddle turns. USG mixing guidance for veneer finish, read October 27, 2026, specifies a cage type paddle on a heavy duty drill at 900 to 1,000 rpm, about 14 to 17 quarts of water in a 12 to 15 gallon smooth sided container for the Special Veneer product, mixing at least 2 minutes to clear lumps and never more than 5 minutes. The same guidance says the finish sets in about one hour, to mix no more than can be applied in 30 minutes, and never to retemper. The Imperial Veneer Finish data sheet gives a water to plaster ratio of 7 to 8 quarts per 50 pound bag for hand application, also read October 27, 2026. The two products differ, so the bag in your hand is the authority. Follow its label.
Keep every tool clean. Set plaster left in a bucket or on a trowel seeds the next mix and shortens its working time. Wash the bucket between batches, and do not scrape set material back into a fresh mix. Do not add water to a mix that has started to stiffen. Retempered plaster looks workable and sets weak, and the wall will tell you months later when it cracks or powders.
Work in small batches until you know your speed. A full bucket that sets before you can lay it is wasted money and a bucket you have to chisel clean. Heat the room to at least 55 degrees Fahrenheit before you start and keep it there until the plaster is dry, per USG application guidance. Cold rooms slow the set and leave a soft finish. Keep air movement low while the plaster is going off. A fan blowing across a fresh wall dries the surface while the back stays wet, and the surface cracks.
How do you apply the base coat and rule it flat?
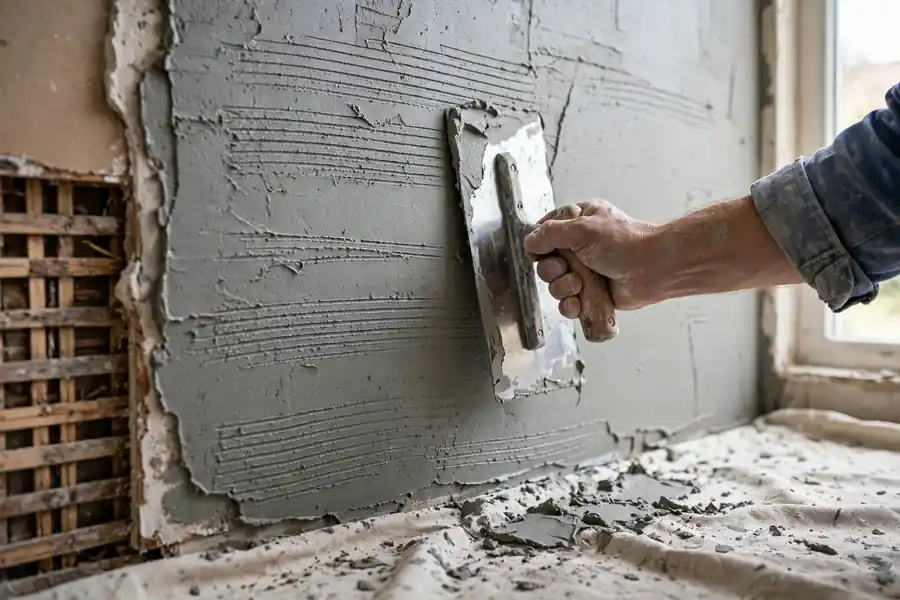
Dampen the base, then lay the scratch coat firmly, pressing it into the lath gaps or the masonry joints. The pressure matters more than the thickness. A coat laid lightly over lath never forms keys. Scratch the surface in a crosshatch pattern and leave it alone until it has hardened.
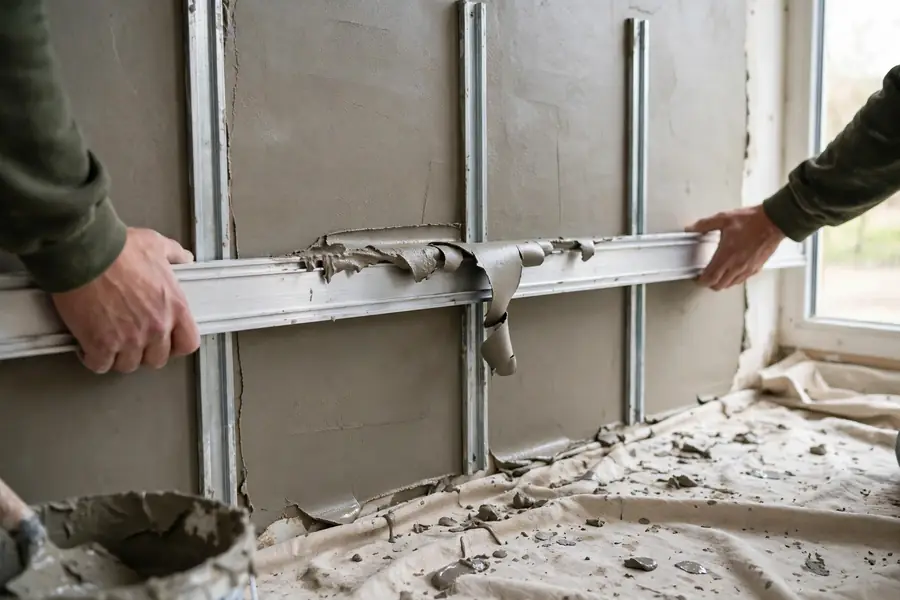
The brown coat is where flatness is made. Lay it on, then rule it with the straightedge held against screed strips or grounds fixed to the wall. Work the straightedge in a sawing motion from the bottom up, and fill every hollow the rule reveals. For a wall that is out of level, set grounds at the finished plaster line: thin wood strips or metal beads fixed plumb and level at intervals across the wall, and rule between them. The grounds also tell you when the coat is thick enough and where it needs building out.
Check with a spirit level as you go, both vertical and horizontal. Walls that look flat to the eye can lean half an inch over their height, and that lean shows at the skirting and the ceiling line. Fix it in the brown coat, while the plaster is still workable.
How do you apply the finish coat and trowel it smooth?
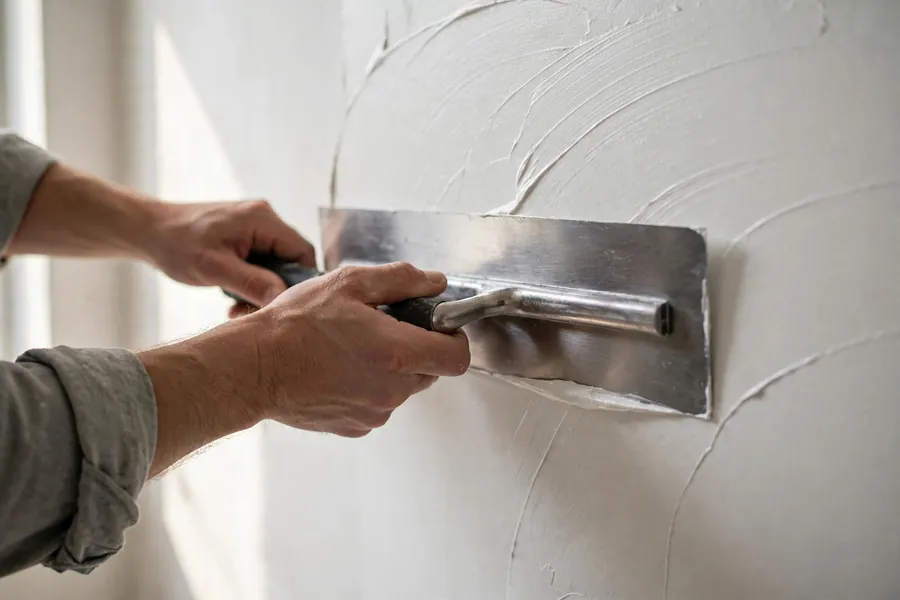
Wait until the base coat has set but not dried out, and the surface is firm and damp. A base that is bone dry sucks the water out of the finish and leaves it short. A base that is still soft moves under the trowel. Dampen a dry base lightly with the spray bottle and wait a few minutes.
Scratch a tight, thin coat over the whole area, then double back with plaster from the same batch to full thickness, per USG veneer application guidance read October 27, 2026. Fill voids and marks as you go. Final trowel after the surface has become firm, holding the trowel flat and using water sparingly, and do not overtrowel. Overtroweling is the main cause of a blotchy, shiny, weak finish. Each extra pass pulls water and fine material to the surface and leaves a layer that dries at a different rate from the body of the coat.
Where a joint between two batches is unavoidable, end the first batch with a sharp, clean edge from the trowel. Do not feather it out. Bring the next batch up to the edge and leave it level, without overlapping. Feathered joints show as ridges once the paint goes on. Work from corner to corner without stopping where you can. A wall finished in one continuous run has no joints to show.
How do you replaster part of a wall and blend the edge?
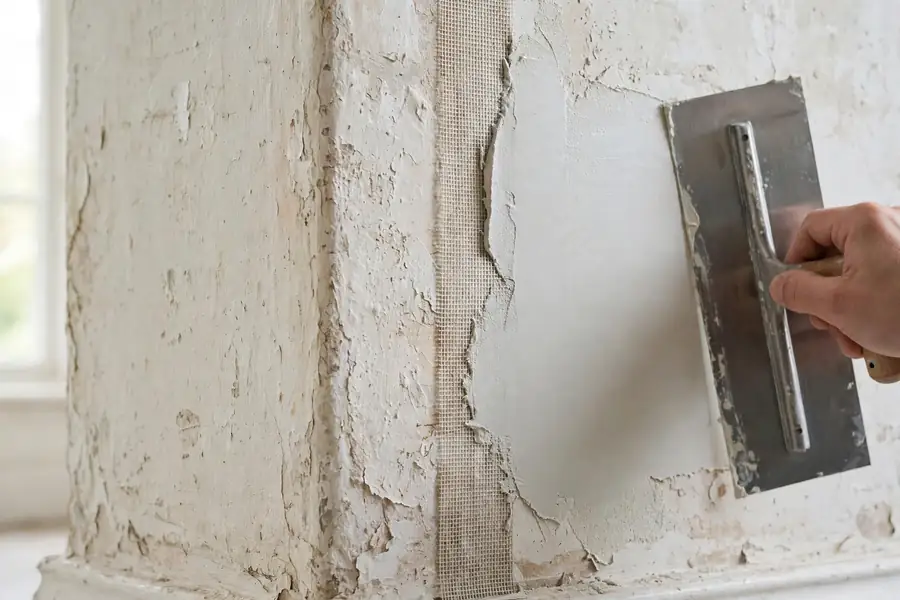
Cut back to sound plaster plus a margin of an inch or two past the last hollow spot. The edge of the repair must be a straight line, cut square through the old coat. A ragged edge makes a ragged joint. Where the repair meets the old plaster, bed a strip of mesh tape or scrim across the joint in the first coat, so the joint cannot open as the new plaster shrinks.
Build the new coats to the same thickness as the old ones, and rule the repair off the surrounding plaster. The straightedge should rest on the old surface on both sides of the repair and cut the new coat level with it. The finish coat can be feathered slightly at the joint, but only the finish coat, and only by a few inches. If the old plaster is thicker than the new build, add a bonding coat first to bring the levels together.
Prime the repair separately before painting the whole wall. New plaster sucks paint at a different rate from old plaster, and the repair will show as a dull patch through the first coat. A mist coat over the new plaster, left to dry, evens the suction before the full coats go on.
How do you replaster a hole in a wall?
A hole that goes through to the lath or the studs is a replastering job, not a patch. Cut the hole back to a square or rectangle, fix new lath or a piece of metal mesh across the opening, and build the coats in the same sequence as a partial replaster: scratch coat keyed through the mesh, brown coat ruled level with the wall, finish coat trowelled smooth. The mesh must be fixed tight. A loose patch flexes and the plaster cracks around its edge.
A hole in drywall is a different repair. Cut a patch panel to fit, screw it to the framing or to a backer board, tape the joints, and finish with joint compound. Plaster over a drywall patch only when the system calls for it, such as veneer plaster over a veneer base. Joint compound and plaster are different materials with different sanding and priming needs, and mixing them on one wall without a plan leaves a visible patch.
Small dents, nail holes, and hairline cracks need neither. Fill them with joint compound, let it dry, sand it flat, and spot prime. A full replaster for a nail hole is wasted work, and a patch done with plaster instead of joint compound is harder to sand and more likely to show.
Can you replaster a damp wall?
No, not until the damp is fixed and the wall is dry. This is the one rule that overrides the rest of the job. Plaster over active damp fails, and it fails in the same place, because the water is still coming. Find the source: a leaking pipe or roof, a failed gutter or flashing, a bridging damp course, or condensation from poor ventilation. Fix the source, then let the wall dry. A wall that looks dry on the surface can still hold water deep in the brick, and a moisture meter reading taken at the surface is not the whole story.
Salts are the second problem. Damp masonry carries salts to the surface, and the salts crystallize behind paint and plaster, pushing them off. Brush off loose salt, and do not seal it in with a waterproof coating or a gypsum coat that traps it. On old masonry with salt contamination, lime plaster is the usual answer because it lets the wall breathe and the salts can be managed at the surface. Gypsum softens when it stays wet, and USG states that veneer plaster is not recommended where contact with water or excess moisture may occur.
Where damp comes from condensation rather than a leak, the fix is ventilation and heat, not a different plaster. A wall that is cold and unventilated will condense water no matter what coat is on it. Sort the room first, then the wall.
How long does plaster take to dry before you can paint?
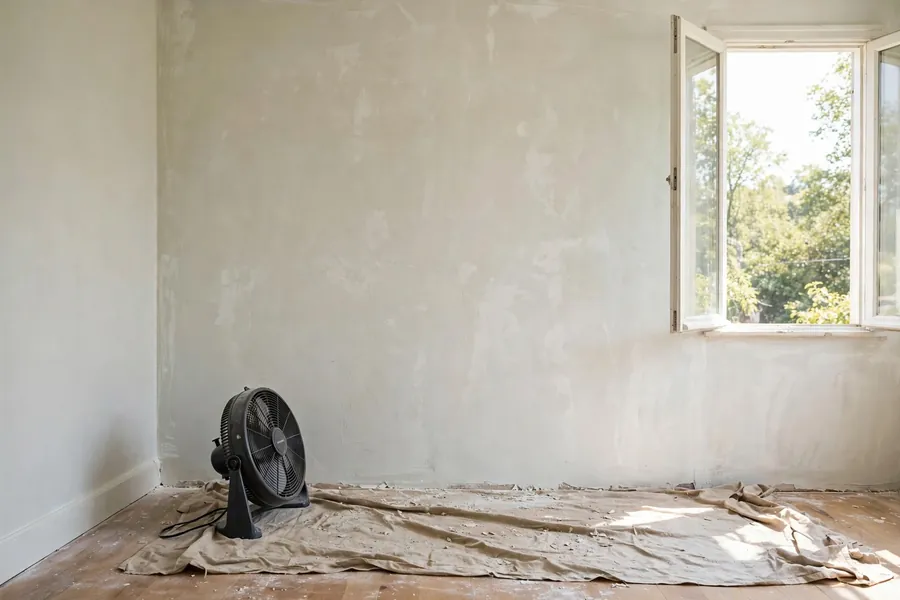
Drying time depends on the system, the thickness, and the room. Ventilation matters more than heat. Open a window slightly and let air move gently through the room. Forced heat from a heater pointed at the wall dries the surface and traps water behind it.
| System | Typical drying time before paint | Notes |
|---|---|---|
| Veneer finish over veneer base | About 24 hours to dry, ready for next day decoration | Use a latex breather type paint; PVA paints are not recommended, per USG |
| Skim coat over sound plaster | 3 to 5 days | Thinner coats dry faster; check the whole wall, not one spot |
| Full float and skim, thick build | 3 to 4 weeks | Trade guidance for a full two coat build; thicker walls take longer |
| Conventional basecoat plaster | About 30 days cure before painting, as a planning allowance | USG states that lime gauging finish over conventional basecoat must age 30 days and be thoroughly dry and sealed before decorating; paint only when completely dry |
The plastic sheet test is the check that matters. Tape a 12 inch by 12 inch sheet of clear plastic to the wall, seal all four edges, and leave it 24 hours, per USG Structo-Lite guidance read October 27, 2026. Condensation under the plastic, or a dark damp patch on the wall when you lift it, means the plaster is not dry. A rule of thumb in the trade is that plaster dries at roughly 1 mm per day, but that is a planning figure, not a test. The wall is dry when the color is even and pale all over, the surface feels the same temperature as the room, and the plastic test stays clear.
How do you paint new plaster without peeling?
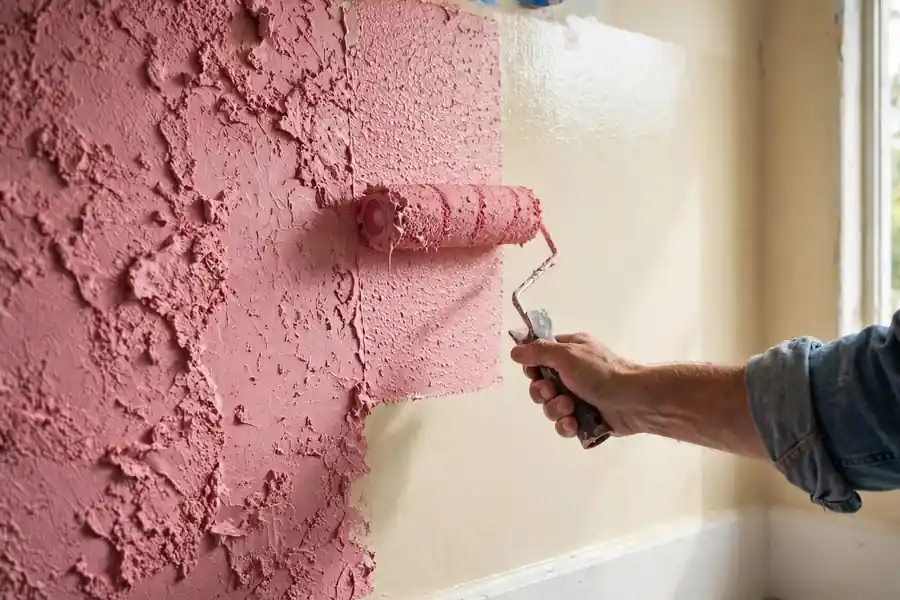
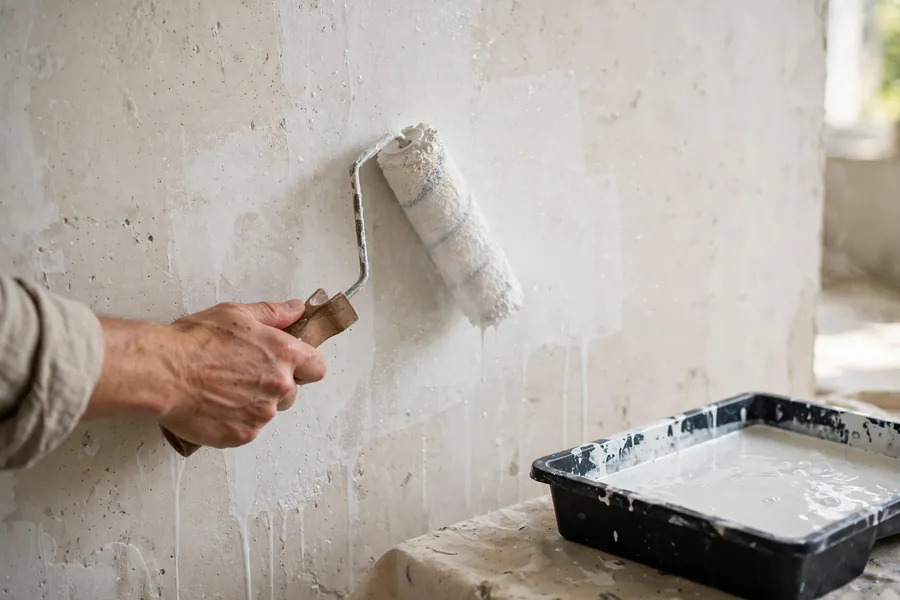
Paint too soon and the paint peels, blisters, or goes patchy. The first coat is a mist coat: ordinary non vinyl matt emulsion, thinned with water, rolled on to seal the surface and even out the suction. Ratios in trade guidance disagree. Common figures run from a 50/50 mix of paint and water to 70/30, 75/25, and as low as 10 percent water for some trade paints, and one paint maker specifies a 1 to 10 ratio of water to paint for its own product. The disagreement is the point. Follow the label on the paint you bought, and keep the mix thinner rather than thicker. A mist coat that is too thick forms a skin that peels. A mist coat that is too thin simply needs a second pass.
Use non vinyl matt emulsion for the mist coat. Vinyl in the first coat can seal the surface and stop later coats bonding. USG guidance for veneer plaster adds that PVA paints are not recommended over veneer finish, and that a latex base breather type paint is the right choice. On lime plaster, use a breathable paint made for lime, such as a limewash or a mineral paint, so moisture can keep moving through the wall.
Let the mist coat dry fully, usually 24 hours, then apply two full coats of the finish paint. Do not rush the second coat over a damp mist coat. The whole paint system is only as good as the first coat, and the first coat is the one most often skipped.
How much does it cost to replaster a wall?
Cost depends on the area, the condition of the base, and whether the work is DIY or hired. The figures below are expectation bands from two Angi cost pages read in full on October 28, 2026: the plastering page, updated October 14, 2026, and the plaster repair page, updated October 27, 2026. Get local quotes before you budget, because rates vary by region and by the state of the wall.
| Measure | Band |
|---|---|
| Cost per square foot, replastering | $2 to $10 |
| Cost per square foot, bare prepared surface | About $5 |
| Added cost per square foot, removing old plaster | About $1 |
| Cost per square foot, plastering over existing material | Up to $10 |
| Average room, full replaster | $2,000 to $8,000, averaging about $5,000 |
| Sealing and painting after plastering | At least $150 added |
What moves the price is the prep. A wall that strips clean and takes a skim coat is at the low end. A wall with failed lath, damp damage, or a ceiling in the same room is at the high end. Lime plaster costs more than gypsum, both in material and in time, because the coats go on thinner and dry slower. Lead or asbestos controls add cost and time, and they are not optional where the materials are present.
DIY saves the labor charge and adds tool costs, waste, and the risk of a redo. A first time plasterer should budget for one practice wall, or one wall done in sections, before taking on a room that will be judged every day. A pro finish on a feature wall is cheaper than replastering the same wall twice.
When should you hire a plasterer instead?
Hire a plasterer for ceilings and heavy overhead work. Plaster overhead is a different skill from plaster on a wall, and falling plaster is a real hazard where the keys have failed. Hire one for lath and plaster ceilings, for whole rooms, and for any wall where the base is structural masonry with movement cracks.
Hire a plasterer where the house is old and the plaster is lime, or where the building is listed. Lime work has its own mixes, its own timing, and its own failure modes, and a gypsum plasterer working on lime can do more harm than a DIY job done slowly. Hire a pro where lead or asbestos testing came back positive, and check that the firm holds EPA RRP certification for pre-1978 work.
Hire a plasterer when the wall is large, the deadline is tight, or the finish will be lit by raking light from a window. Raking light shows every trowel mark and every wave in the wall. A trade finish under that light is worth the fee. DIY suits a single wall, a utility room, or a wall that will sit behind furniture, where a first attempt can be judged honestly.
What can go wrong, and how do you fix it?
| Problem | Cause | Fix |
|---|---|---|
| Cracks as the plaster dries | Coat laid too thick, room too hot, or air moving fast over the surface | Cut out the cracked area, dampen, and relay thinner; control heat and drafts next time |
| Plaster sounds hollow after drying | Dusty or dry base, no bonding agent, or keys never formed | Remove the hollow section and redo the prep; a hollow coat cannot be saved by filling |
| Blistering or peeling finish | Moisture behind the coat, or paint laid over damp plaster | Strip the finish, dry the wall, test with the plastic sheet, and start the finish again |
| Trowel marks and shiny patches | Overtroweling, or troweling after the plaster had started to set | Skim the wall again once dry, and trowel less next time |
| Salts on the surface | Damp masonry, salts crystallizing behind the finish | Fix the moisture source, brush off salts, and use a breathable system on old masonry |
| Uneven color through the paint | New and old plaster sucking paint at different rates | Mist coat the new plaster first, then paint the whole wall |
Most failures trace back to one of three causes: a base that was not prepared, a coat laid too thick, or paint laid too soon. Fix the cause, not the symptom, and the repair lasts.
How to replaster a wall without redoing the job
The short version of how to replaster a wall is this: test the wall, strip what has failed, prepare the base for the system you chose, build the coats to level, let the plaster dry fully, and paint it with a mist coat first. The plastering itself is the middle of the job. The testing and the drying are what decide whether it lasts. A wall that sounds solid when tapped, reads flat under a straightedge, and passes the plastic sheet test is ready for paint. A wall that fails any of those three checks is not finished yet, whatever it looks like.
Quick answers to common questions
Can you skim coat over old plaster instead of replastering? Yes, when the old plaster is hard, flat, dry, and firmly bonded. A skim coat renews the surface without the weight and thickness of a full replaster. When the old plaster is hollow, soft, or damp damaged, a skim coat will fail with it, and the wall needs a partial or full replaster.
How long should you wait before painting new plaster? Wait until the plaster is dry through, not just dry on the surface. Veneer finish takes about 24 hours. A skim coat takes 3 to 5 days. A full float and skim build takes 3 to 4 weeks, and conventional basecoat plaster needs about 30 days of curing as a planning allowance. Check with the plastic sheet test before you paint, whatever the calendar says.
Can you plaster over drywall? Yes, with the right system. Veneer plaster is made to go over veneer base board, and skim coats go over sound drywall that has been taped and primed. Standard joint compound finishing is the usual route for regular drywall, and it is a different process from plastering. Do not plaster over torn or damp drywall face paper.
Do you need to seal new plaster before painting? Yes. New plaster is porous and sucks paint unevenly, which leaves a patchy finish and a weak bond. A mist coat of thinned non vinyl matt emulsion seals the surface and evens the suction. On veneer plaster, use a latex breather type paint, and follow the product label for thinning and timing.
Is lime plaster better than gypsum plaster for an old house? Lime is the safer choice for old solid masonry walls that take in moisture, because it lets water vapor move through the wall instead of trapping it. Gypsum suits dry interior walls and modern construction, and it sets faster and finishes harder. Where the wall is damp or the house is listed, lime is the default. Where the wall is dry and the existing plaster is gypsum, matching gypsum is reasonable.