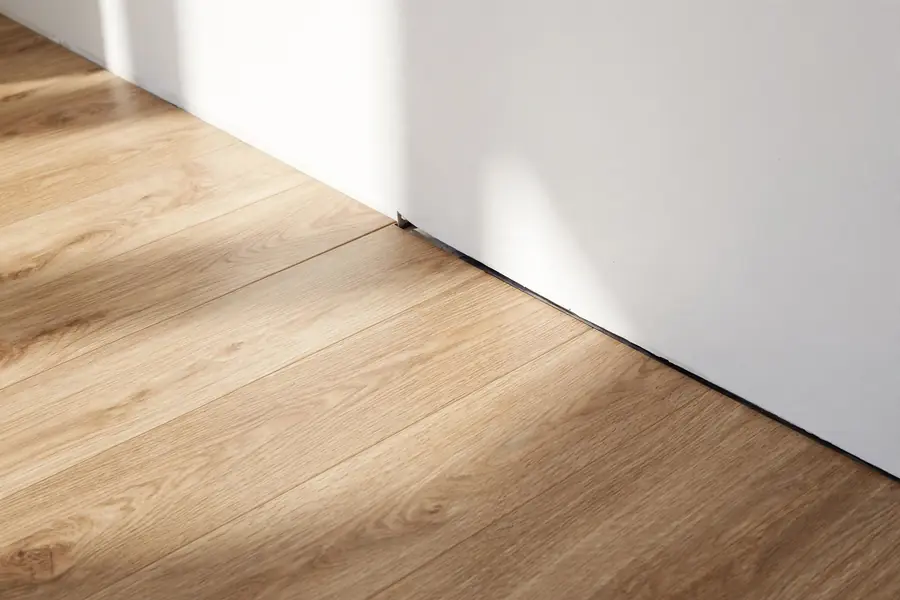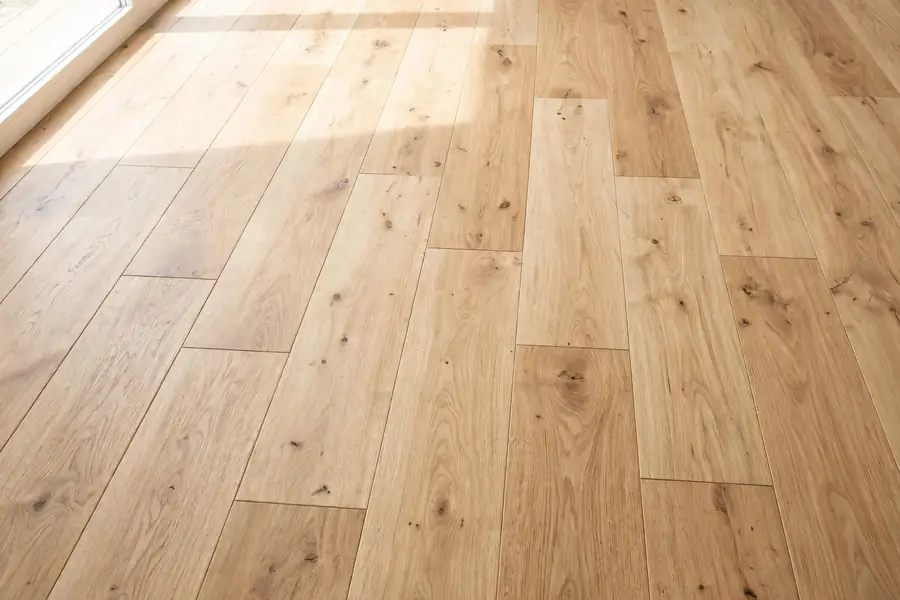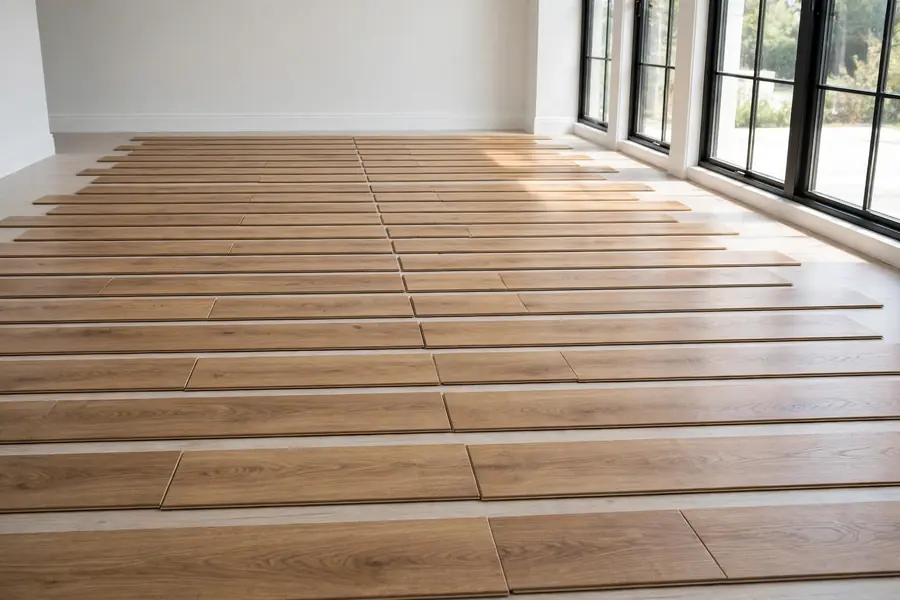
Here is how to install vinyl plank flooring in nine steps. Make sure the subfloor is flat, clean and dry. Let the planks adjust to the room if the maker asks for it. Plan the rows, leave a gap at every wall, click the first row together, and build row by row with staggered end joints. Cut the last row to fit, then cover the gap with trim. A click-lock floor in a 12 by 12 foot room usually takes four to six hours.
The nine steps at a glance
- Prepare the subfloor. Make it flat, clean, dry and solid.
- Let the planks adjust. Do this only if the maker asks for it.
- Plan the layout. Pick the direction and balance the first and last rows.
- Set the first row. Use spacers to hold a gap at the wall.
- Click the planks together. Work row by row.
- Stagger the end joints. Keep them at least 6 inches apart.
- Cut planks to fit. Handle doors, pipes and corners.
- Fit the last row. Measure it, rip it and pull it into place.
- Add trim and transitions. Cover the gap and finish the edges.
Each step is explained below, along with the numbers to use and the mistakes that cause trouble.
Which numbers matter before you start?
Most click-lock installs use the same few numbers, but every maker sets its own, and the maker's number always wins. Read the instructions in the box before you cut anything.
| Item | Common figure | Notes |
|---|---|---|
| Gap at walls and fixed objects | 1/4 inch | Some WPC products ask for 3/8 inch |
| End-joint stagger | 6 inches or more | Some makers ask for 8 inches or more |
| Subfloor flatness | 3/16 inch over 10 feet | Some makers allow only 1/8 inch |
| Room temperature | 65 to 85°F | Check the range on the box |
| Time to adjust to the room | 0 to 72 hours | Often 48 hours. Some rigid SPC planks need none |
| Extra planks to buy | 10% | 15% for closets and odd shapes, up to 20% for diagonal layouts |
| First and last plank in a row | 8 inches or longer | Avoids short slivers at row ends |
When two sources disagree, follow the stricter number. A gap that is a little too big is hidden by trim. A gap that is too small can buckle the floor.
How long does it take, and can a beginner do it?
A beginner can install click-lock vinyl plank in a simple room. It is one of the more forgiving DIY floors, and most of the time goes into prep and cuts, not the clicking. A bedroom of about 12 by 12 feet usually takes four to six hours. A good pace is 200 to 300 square feet a day, and a large open area can take a full weekend.
Hire a professional if you face any of these:
- A concrete slab with high moisture readings or cracks
- A glue-down install across a large area
- Stairs, curved walls or a pattern layout
- A subfloor that needs major leveling
What tools and materials do you need?
Basic hand tools cover most of the job. A saw is only needed for rigid planks and narrow cuts.
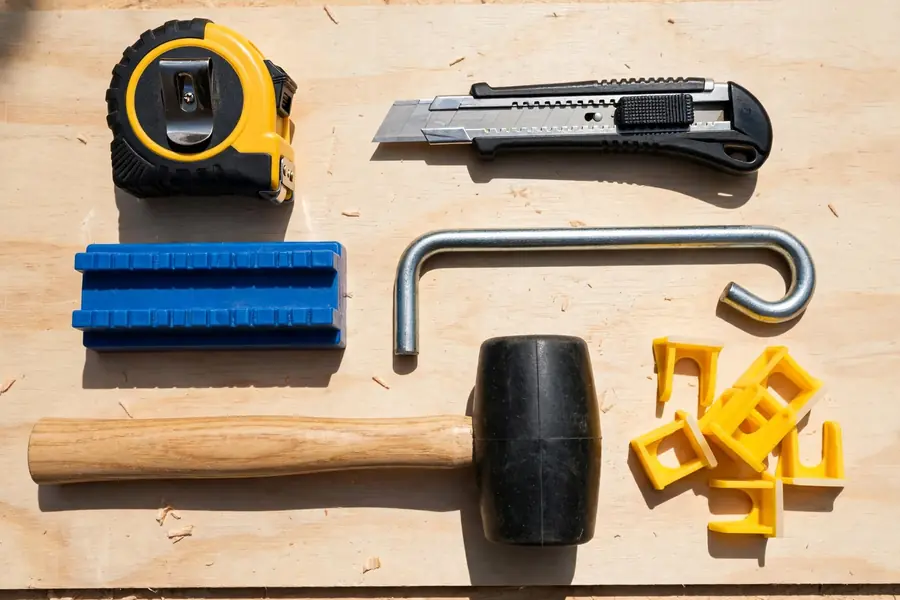
| Tool | What it does |
|---|---|
| Tape measure and pencil | Measure rows and mark cuts |
| Utility knife | Scores and snaps thinner planks |
| Tapping block and rubber mallet | Close joints without damaging the edges |
| Pull bar | Pulls the last plank in each row tight to the wall |
| Spacers (20 to 40) | Hold the gap at the walls |
| Straightedge or 4-foot level | Checks flatness and keeps rows straight |
| Fine-tooth saw | Cuts rigid planks and narrow strips |
| Jamb saw or oscillating tool | Undercuts door casings |
| Knee pads and safety glasses | Protect your knees and eyes |
You also need planks (with 10% extra), transition strips, quarter-round or baseboard, and a patching or self-leveling compound for low spots. Buy underlayment or a moisture barrier only if the product needs one. For glue-down, add the adhesive and a notched trowel.
Which installation method should you use?
Use click-lock for most homes and glue-down for busy or very large areas. Both are common, and the planks are usually made for one or the other.
| Method | How it works | Best for | Watch out for |
|---|---|---|---|
| Click-lock floating | Planks lock to each other and rest on the subfloor without glue | Most homes and DIY installs | Needs room to expand. Should not be pinned under fixed cabinets |
| Glue-down | Each plank is stuck to the subfloor with adhesive | Busy rooms, large spaces and some commercial jobs | Messy, hard to undo, and shows every flaw in the subfloor |
Loose-lay planks grip the floor with little or no adhesive and suit large, flat rooms. Follow the maker's rules for those. The rest of this guide covers click-lock, and the steps note where glue-down differs.
How do you prepare the subfloor?
The subfloor must be flat, clean, dry and solid. Skipping this step is behind many installation problems, including gaps, peaking joints and loose planks.
Check that it is flat
Most makers want the floor flat within 3/16 inch over 10 feet, and some allow only 1/8 inch. Lay a 10-foot straightedge or a 4-foot level in several directions and look for gaps underneath it. Click-lock joints flex over dips and can separate.
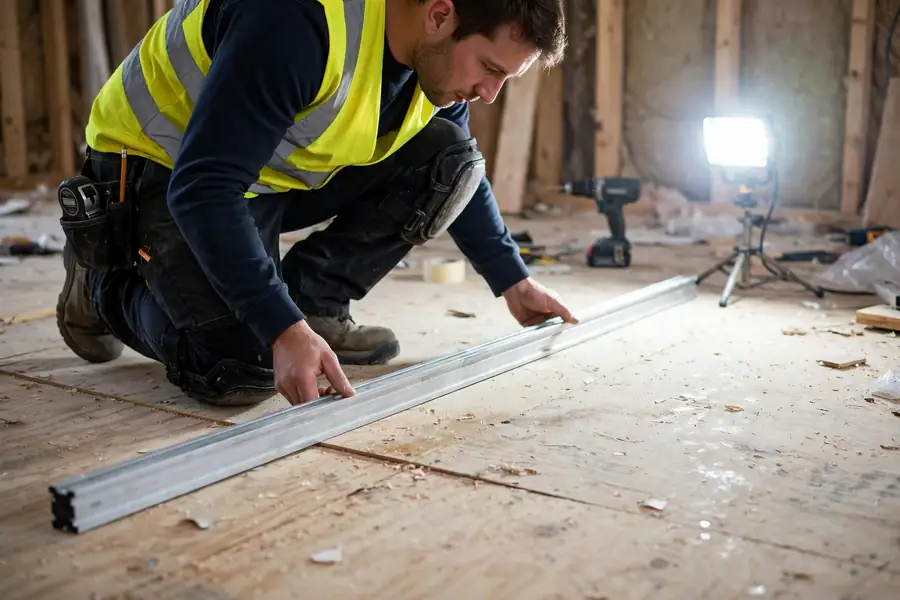
Sand or grind down high spots. Fill low spots with a patching or self-leveling compound, and let it cure fully before you install.
Check that it is dry
Moisture under a vinyl floor has nowhere to go, so test before you install, especially on concrete.
- Concrete. New slabs need time to cure, often 60 days or more. Makers commonly ask for a moisture test. The two usual tests are an in-slab humidity probe (ASTM F2170) and a calcium chloride test (ASTM F1869). Typical limits are about 75 to 80 percent relative humidity, or about 3 to 5 pounds of moisture per 1,000 square feet per 24 hours. Limits differ by product, so check yours.
- Too wet? Do not install. Ask about a moisture barrier system or choose a product with a higher limit.
- Wood. Makers often cap the moisture content of a wood subfloor at about 13 percent. Check the spec for your product.
Clean and clear
Vacuum the floor and scrape off paint drips and bumps. Remove the baseboards and any threshold strips. Trim door casings now if you plan to undercut them.
Know what is under the new floor
| Existing surface | Can you install over it? |
|---|---|
| Plywood or OSB | Yes, if it is flat, solid and well fastened |
| Concrete | Yes, if it is flat and dry |
| Ceramic tile | Often, if the tile is solid and level. Fill grout lines deeper than about 1/16 to 1/8 inch |
| Sheet vinyl | Sometimes. It must be bonded, clean and flat. Check the maker's guide |
| Carpet | No. Remove it and its pad |
Decide on underlayment
If the planks have an attached pad, add nothing. A second layer makes the floor too soft, and the joints can fail. Over concrete, use a vapor barrier or an underlayment with moisture protection if the maker requires it. Over wood, thin foam or cork is common. Use one layer only, and keep it thin, usually 1 to 2 mm.
Do vinyl planks need to acclimate?
It depends on the product. Many makers ask for about 48 hours in the room, some ask for 24 hours, and some rigid SPC planks need none. Follow your instructions. Keep the room between 65 and 85°F, store the boxes flat, and open them in the room where they will be installed. Some guides suggest up to 72 hours in damp spaces such as basements and bathrooms.
How do you plan the layout?
Pick the direction
Run the rows parallel to the longest wall. You make fewer cuts, and the room looks longer. If the floor runs through a doorway into the next room, keep the rows pointing the same way.
Balance the first and last rows
Measure the room across the rows and divide by the plank width. If the last row would be narrower than about 2 inches, cut the first row narrower so the first and last rows match.
Here is an example. A room is 11 feet 10 inches wide, which is 142 inches. Subtract 1/2 inch for the two wall gaps, leaving 141.5 inches. The planks are 7 inches wide.
- 20 full rows would use 140 inches and leave a 1.5 inch strip. That is too narrow.
- Instead, use 19 full rows (133 inches) and cut the first and last rows to the same width.
- Add the 1.5 inch strip to one plank width: 7 + 1.5 = 8.5 inches. Divide by two to get 4.25 inches for each end row.
Stagger the end joints
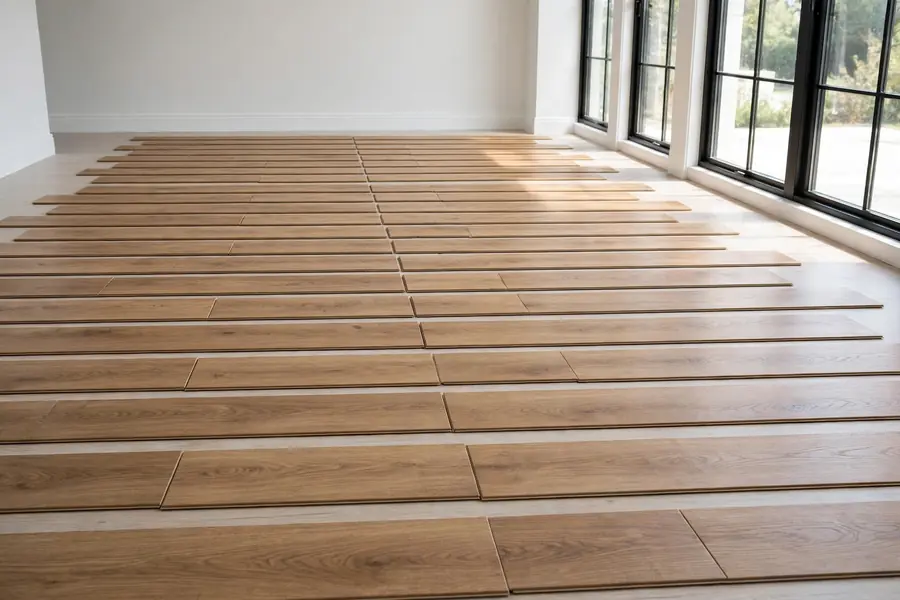
Keep end joints at least 6 inches away from the joints in the neighboring rows, and use 8 inches or more if your maker asks for it. Never let joints line up within three rows. Avoid an H pattern, where joints in alternating rows line up, and a stair-step pattern, where each row shifts by the same amount.
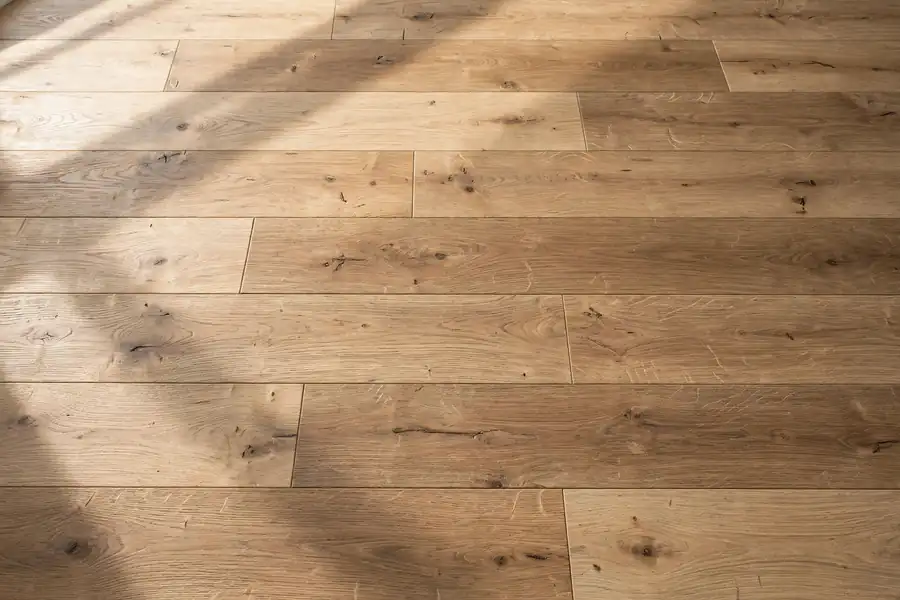
Start the next row with the offcut from the end of the previous row if it is 8 inches or longer. It saves material and gives you a natural stagger. Mix planks from several boxes as you go, so slight shade differences blend. Dry-lay the first two rows before you lock anything.
How do you install vinyl plank flooring, step by step?
These steps cover click-lock planks. Always follow the order in your product's instructions, because the locking system differs from brand to brand.
Step 1: Set the first row
Start along the straightest wall. Walls are rarely straight, so measure out the width of one plank plus the gap and mark a guide line, then work to the line instead of the wall. Place spacers along the wall and at the end. Lay the first plank with its end in the corner, then add the next plank at its end. Many makers want the first plank in every row to be at least 8 inches long.
Step 2: Click each plank into place
Most click-lock planks lock with a hinge motion. Set the edge of the new plank against the plank beside it at a low angle, often around 20 degrees. Press it in, then lower it flat until the joint clicks. Some products lock the short end first and others lock the long edge first, so follow your guide.
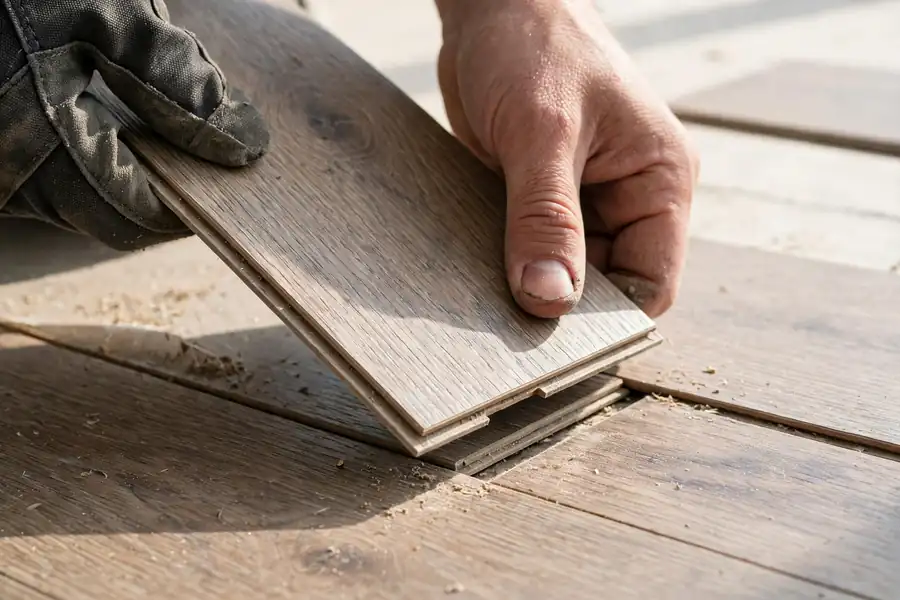
Use a tapping block and a rubber mallet to close the joint. Never hit the plank edge directly. If a joint will not close, pull the plank back out and check for debris. Forcing it breaks the locking edge.
Step 3: Build the next rows
Work across the room one row at a time. Check that each plank is tight on both its long and short edges. Every three or four rows, check for gaps and keep the rows straight against your guide line. Keep the spacers in place at the walls.
Step 4: Fit the last row
Lay a loose plank over the last installed row, then put another plank on top of it with its edge against the wall spacer. Trace along the top plank's edge onto the bottom one. That line is your cut. Cut the plank, then use the pull bar to draw it tight to the row. For very narrow strips, under about 2 inches, a table saw is the safest tool.
What changes with glue-down
Spread the adhesive in sections about 3 to 4 feet wide with the trowel size on the label. Wait for the tack time on the label, often 10 to 20 minutes. Press each plank into the adhesive, then roll the floor with a heavy roller, often about 100 pounds. Follow the adhesive label and the maker's guide for gaps and cure times.
How do you cut vinyl planks around doors, pipes and corners?
Measure twice and cut once. Thinner planks often score and snap with a utility knife, and rigid SPC planks cut cleaner with a fine-tooth saw. Advice on the number of scoring passes varies, so test on a scrap plank first.
| Cut | How to do it |
|---|---|
| Straight cut at the end of a row | Score several times and snap over a straight edge, or cut with a fine-tooth carbide blade of 60 to 80 teeth |
| Narrow strips under about 2 inches | Use a table saw |
| Door casings | Undercut the casing with a jamb saw, using a scrap plank as a height guide, so the plank slides underneath |
| Pipes | Drill a hole 1/2 inch larger than the pipe, cut the plank through the hole, fit the pieces and cover the gap with a pipe collar |
| Floor vents | Cut an opening with a small gap on every side. The vent cover hides it |
| Uneven corners | Trace the shape with a cardboard template |
Avoid a jigsaw on edges that show, because its chatter can chip the printed film. On a circular saw, many installers cut with the pattern side down to protect the surface.
Can you install vinyl plank under cabinets or around islands?
Install floating vinyl up to the cabinets, not under them. Most makers want a click-lock floor to move freely, and a fixed cabinet and its contents pin it in place. Installing it under fixed cabinetry typically voids the warranty. Leave the same gap you leave at a wall and hide it with the toe kick or trim. A movable island can sit on top of the finished floor, but check your maker's guide before you place heavy fixed appliances.
How do you finish the floor?
Pull out the spacers. Install quarter-round or baseboards, and nail them to the wall, not through the planks. Leave about 1/16 inch of clearance above the floor so it can move. Add transition strips at doorways and wherever the floor meets another surface. Many makers also limit how long a continuous run can be, so ask yours before you cross a very long hallway or several rooms without a break.
Which mistakes ruin an installation?
| Mistake | What goes wrong | How to avoid it |
|---|---|---|
| Skipping subfloor prep | Gaps, peaked joints and loose planks | Flatten and clean it first |
| No gap at the walls | The floor buckles when it expands | Use spacers on every wall |
| Wrong underlayment | Joints flex and fail | Add none if the planks have a pad |
| Joints lined up | Weak seams and an obvious pattern | Keep joints at least 6 inches apart |
| Forcing joints | Broken locking edges | Pull the plank out and clear debris |
| Fixing the floor under heavy cabinets | The floor cannot move and may buckle | Install up to the cabinets |
| Skipping the moisture test | Moisture trapped under the planks | Test concrete before you start |
| Ignoring the instructions | Voided warranty | Read them before you cut |
How much does a DIY install cost?
A DIY install costs the price of the planks plus a few supplies. A professional adds labor of about $1.50 to $4.00 per square foot in 2026 estimates, so doing it yourself saves most of that.
| Item | Per square foot | For a 300 sq ft room |
|---|---|---|
| Planks | $2 to $7 | $600 to $2,100 |
| Underlayment, if needed | $0.25 to $0.50 | $75 to $150 |
| Professional labor | $1.50 to $4.00 | $450 to $1,200 |
Add trim, transition strips and any tools you need to buy, and order 10% extra planks. These are estimates, not quotes.
Quick answers to common questions
Why is my new vinyl plank floor buckling or gapping?
The usual causes are a missing wall gap, trapped moisture, an uneven subfloor, joints that never fully locked, or direct sun heating the floor. Check that the floor can move at every wall first. If planks are peaking, lift the nearby rows and look for debris, dips or moisture, then re-lock them.
How long before you can move furniture back?
On a click-lock floor you can usually walk on it right away and move furniture back the same day. Use felt pads and lift instead of dragging. For glue-down, follow the adhesive label, since heavy furniture often has to wait a day or more.
Should you remove the toilet before installing vinyl plank?
Many installers do. Pulling the toilet lets the planks run neatly under the flange and avoids awkward cuts around the base. Reset it with a new wax ring afterward. If you leave it in place, cut carefully around it and keep the gap hidden under caulk or trim.
Can you install vinyl plank flooring in a bathroom?
Yes, and it is a common choice. Use a waterproof or water-resistant plank, keep the subfloor dry, and seal the edges where the floor meets the tub, shower or toilet with flexible caulk. Keep the expansion gap, and keep standing water off the floor.
How do you replace one damaged plank?
Common methods are to take the rows apart back to the damaged plank and swap it, or to cut out the center of the damaged plank, trim the locking edge from the new one and glue it in. Keep a few spare planks from your order for repairs, and check your maker's guide for its preferred method.
Keep reading: what LVP flooring is, how to clean vinyl flooring and vinyl plank labor costs.
Is a DIY install worth it?
Yes for most people with a flat floor and a simple room. You can install vinyl plank flooring yourself in a day, save the labor cost, and end up with a floor that looks and works like a professional job, as long as you do the prep and follow the maker's numbers.
Hire a professional if the slab is damp or cracked, the subfloor needs real leveling, or you plan a glue-down over a large area. The extra cost is small compared with pulling up a failed floor.