A doorknob hole, a crack over a door, or a strip of loose tape all ask for the same thing: a patch that sits flat and stays flat. Learning how to repair drywall starts with matching the fix to the size and cause of the damage, not with the tub of compound. Small holes take filler, medium holes take a patch, large holes take a cut-out piece screwed to backing, and cracks take tape bedded in compound. Pick the wrong fix and the damage shows again within months.
Damage at a glance
| Damage | Size or sign | Fix that holds |
|---|---|---|
| Nail or screw hole | Up to about 1/4 inch wide | Filler pressed in flush, sanded, primed |
| Anchor hole | 1/4 inch to about 1/2 inch wide | Filler in two passes, or a small patch when the paper is torn |
| Dent or gouge | Shallow, paper intact | Filler or a thin skim of compound |
| Small hole | Up to about 4 inches wide | Self-adhesive mesh patch with compound |
| Medium hole | 4 to 12 inches wide | California patch, or a cut-out patch on backing |
| Large hole | Over 12 inches wide, or a door knob hole with crushed edges | Cut-out patch screwed to wood backing or to studs |
| Hairline crack | Thin, no movement | V-groove, tape, and compound |
| Recurring crack | Returns after a patch, or runs from a door or window corner | Find the movement first, re-tape with paper tape, call a pro when structure is in doubt |
| Loose tape | Bubble, peel, or a lifted seam | Cut out the failed tape and re-bed new tape |
| Nail or screw pop | A bump with a fastener head under it | Re-fasten beside it, set the old fastener, fill |
| Torn paper | Fuzz, flap, or brown gypsum showing | Seal the paper, then skim |
| Wet or moldy board | Soft, swollen, stained, or moldy | Dry first, cut out what stays soft, replace the board |
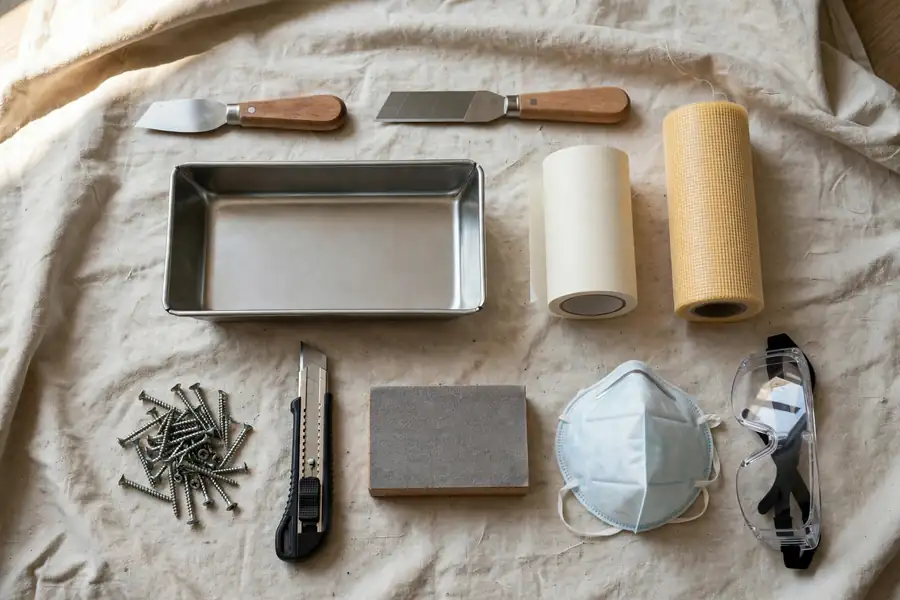
What tools and materials do you need before you cut?
Gather the tools and materials for the largest repair on the list before you open the wall. A patch that waits overnight with an open hole collects dust and invites a second trip to the store, and compound that skins over in the pan will not bond the same way. Buy the board to match the board already on the wall, usually 1/2 inch thick on walls, and keep offcuts from the same sheet for patches.
| Item | What it does | Notes |
|---|---|---|
| Utility knife with fresh blades | Scores paper, trims patches, opens cracks | Dull blades tear paper and leave a ragged edge |
| Drywall saw or jab saw | Cuts the opening square | Keep cuts straight so the patch has a clean seat |
| Stud finder and pencil | Locates framing and marks cut lines | Mark both edges of each stud, not only the center |
| Drill or driver and drywall screw bit | Sets screws just below the paper | Stop at a slight dimple, never break the paper |
| 6 inch, 10 inch, and 12 inch taping knives | Spread and feather compound in wider passes | A wide knife hides a seam, a narrow knife leaves a ridge |
| Putty knife, 3 inch or 4 inch | Fills small holes and dents | Keep the blade clean between passes |
| Sanding block and 120 grit and 150 grit paper | Levels each coat without gouging | Sand dry compound only, with a dust mask on |
| Self-adhesive mesh patch or patch kit | Bridges a small hole | Kits commonly include a 4 inch by 4 inch patch, as described in the Home Depot repair guide read in full on October 28, 2026 |
| Paper tape and fiberglass mesh tape | Reinforces seams and crack repairs | Paper for corners and moving joints, mesh only with setting-type compound on the first coat |
| Ready-mixed compound and setting-type compound | Fills, beds tape, and feathers seams | Ready-mixed sands easy and dries slow, setting compound hardens by chemical reaction and sands hard |
| Spackle or lightweight filler | Fills nail holes and shallow dents | Use it thin, never as a patch over an open hole |
| Scrap drywall, wood backing, or drywall clips | Supports a cut-out patch | Backing must sit flush behind the existing board |
| Primer and paint | Seals bare compound and blends the repair | Bare compound drinks paint at a different rate than painted wall, so it flashes without primer |
| Drop cloth, painter tape, dust mask, eye protection, gloves | Keeps dust and compound off floors and out of lungs | Joint compound dust is fine and travels far, so seal the room when you sand |
Which compound should you use: spackle, ready-mixed, or setting compound?
Use spackle for nail holes and shallow dents, ready-mixed compound for finish coats, and setting-type compound for the first coat over mesh tape and for fills that must harden fast. The three products look alike in the pan and behave differently on the wall. Spackle shrinks little in a thin fill and sands fast, but it has no strength across an open hole. Ready-mixed compound, often called premixed mud, dries by evaporation, sands easy, and shrinks as water leaves, so thick fills crack and need repeat coats. Setting-type compound hardens by a chemical reaction, shrinks little, and holds a heavy fill, but it must be smoothed before it sets because it sands hard once it hardens.
| Compound | Best use | Drying or setting | Sanding |
|---|---|---|---|
| Lightweight spackle | Nail holes, screw holes, shallow dents | About 15 to 30 minutes for a thin fill, per the Home Depot guide read in full on October 28, 2026 | Easy, light pressure only |
| Ready-mixed all-purpose compound | Tape coat, fill coats, finish coats | Overnight per coat on a patch, longer in cold or damp rooms | Easy, the usual choice for the last coat |
| Setting-type compound, 20 minute grade | First coat over mesh tape, heavy fills, same-day work | Setting time 20 to 30 minutes for USG Sheetrock Durabond 20, per the USG submittal sheet read in full on October 28, 2026 | Hard, smooth it while damp |
| Setting-type compound, 45 minute grade | First coat over mesh tape with more working time | Setting time 30 to 80 minutes for USG Sheetrock Durabond 45, per the USG submittal sheet read in full on October 28, 2026 | Hard, smooth it while damp |
| Setting-type compound, 90 minute grade | Larger first coats, warm rooms, slower hands | Setting time 85 to 130 minutes for USG Sheetrock Durabond 90, per the USG submittal sheet read in full on October 28, 2026 | Hard, smooth it while damp |
The number on a setting-type bag names its approximate setting time, not its working time. Mix only as much as you can spread before the clock runs out, keep the pan and tools clean, and never add water to stretch a batch that has started to stiffen. A batch that stiffens in the pan will not bond well on the wall. For the finish coat, switch back to ready-mixed compound. It feathers thinner and sands to a flat edge with less risk of a hard ridge showing through paint.
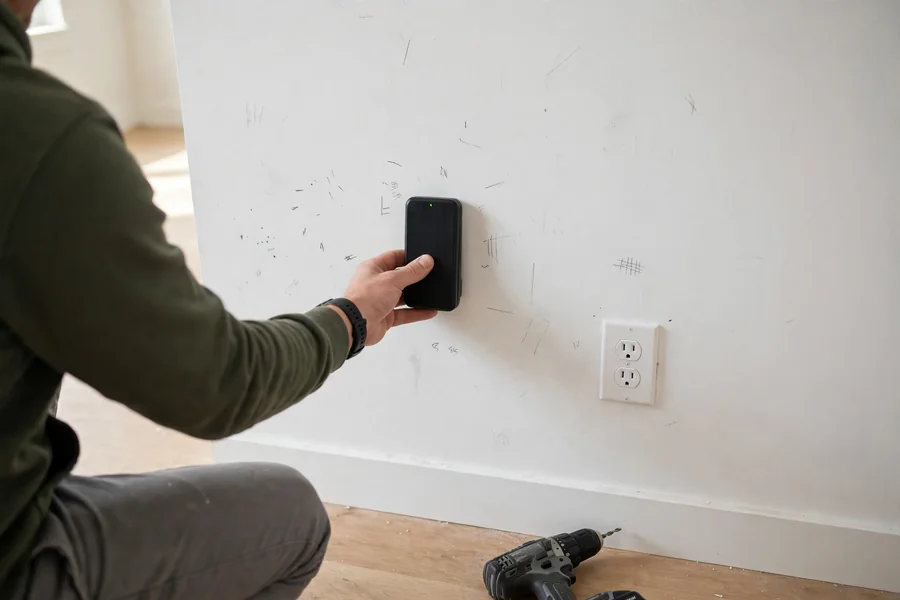
How do you check what is behind the wall before you cut?
Check for wiring, pipes, and framing before the saw touches the wall. A patch cut in the wrong place can nick a cable, pierce a pipe, or land on a seam with no backing, and each of those turns a one-hour repair into a trade call. Switch off power at the breaker for any circuit that serves an outlet, switch, or fixture near the repair, and test that the outlet is dead before you cut. Use a stud finder to mark framing, and keep cut lines at least a few inches clear of outlet and switch boxes unless the box itself is part of the repair. When a cut must pass near a box, cut shallow with a utility knife first and look inside before the saw goes deeper.
Treat age as a stop condition. In a home built before 1978, painted surfaces may hold lead paint. The US Environmental Protection Agency Renovation, Repair, and Painting rule covers paid work that disturbs painted surfaces in pre-1978 homes, and the rule, read in full on October 28, 2026, describes minor repair and maintenance as work disturbing 6 square feet or less of painted surface per room inside. Paid work above that line needs a certified firm and lead-safe practices. A homeowner working on their own home is generally outside the rule, but the dust is the same either way, so mist surfaces, keep dust contained, and clean with wet methods. When paint is peeling, chalking, or layered thick on old trim, test it or assume lead is present and work wet. In a home with a popcorn or sprayed texture ceiling from the 1970s or earlier, stop and have the texture tested before you sand or scrape it. Do not dry-sand suspect material to find out.
Look for the cause while the wall is open. A wet patch, a stain, a musty smell, or insulation that feels damp means water got in, and patching over it traps the problem. Find the leak, fix it, and let framing and board dry before you close the wall. A crack that runs diagonally from a door or window corner, a door that sticks in the same wall, or a floor that slopes near the crack points to movement. Patching alone will not hold it.
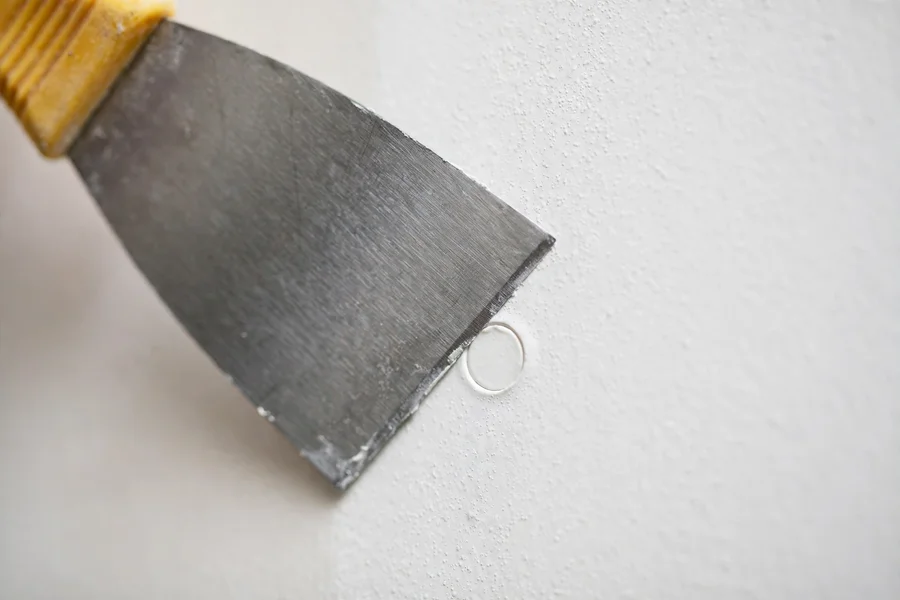
How do you fix nail holes and screw holes?
Press filler into the hole and leave it flush with the wall, then sand and prime once it is dry. Nail holes and screw holes are the smallest repair on the list, and they fail only when filler is smeared over the surface instead of pressed into the hole. Push a small amount of spackle or lightweight filler into the hole with a putty knife, drag the blade flat across the surface to shear off the excess, and leave no mound. A mound sands into a shiny flat spot that shows through paint. Let the fill dry fully, sand it level with 150 grit paper using light pressure, wipe the dust off with a damp cloth, and prime the spot before paint. One pass fills most nail holes. A hole that sinks as it dries needs a second thin pass, not one thick pass.
Remove loose material first. A nail hole with a raised rim or a torn paper edge will telegraph through filler, so press the rim flat with the handle of a screwdriver or trim the torn paper with a utility knife before you fill. When a screw hole is stripped and the screw spins, the anchor point is gone. Fill the hole, let it dry, and drive a new screw into framing or a sound anchor point beside it. Never hang weight from filler alone. For a picture hook or a light shelf, the fix is a proper anchor in sound board or a screw into a stud, and the old hole is filled only after the new fixing holds.
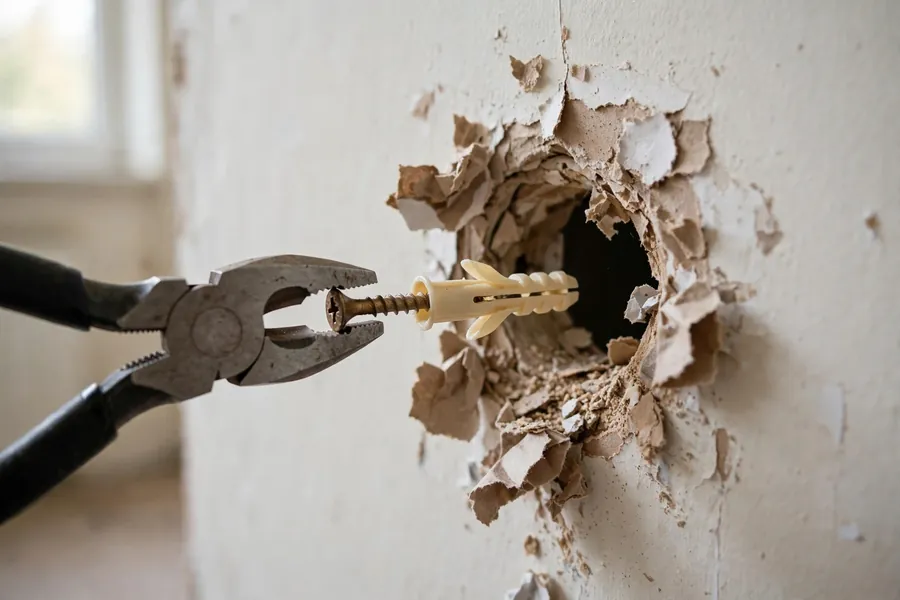
How do you fix anchor holes left by wall anchors and curtain rods?
Pull the anchor out, close the hole from the back where you can, and fill in thin passes. Anchor holes fail when a plastic sleeve or toggle wing is left in the wall and filler is packed around it, because the sleeve moves and the fill cracks at its edge. For a plastic expansion anchor, drive a screw partway in, grip the screw with pliers, and pull the anchor straight out. For a toggle bolt, push the wing through into the cavity or pull the bolt head until the wing folds, then patch the hole. For a curtain rod that pulled out, the board around the hole is often crushed. Cut back to firm board with a utility knife, even if the hole grows to an inch or two, and use a self-adhesive mesh patch and compound rather than filler alone.
Fill an anchor hole in two thin passes. Press filler into the hole, let it dry, sand it, and fill again if it sank. Holes wider than about 1/2 inch, or holes with torn paper around the rim, take a self-adhesive mesh patch and compound instead of filler. When the rod or shelf goes back up, move the fixing to a stud or use a toggle anchor rated for the load, and spread the load across two fixings. Filler and spackle hold paint, not weight. A rod that pulled out once will pull out again from the same hole if nothing changes about how it is fixed.
How do you fix a dent or a gouge?
Fill a dent with a thin skim of compound and feather the edges wide, and cut out a gouge that broke the paper before you fill it. A dent with intact paper needs no patch. The paper face is still whole, so it still carries the surface. Press a thin coat of ready-mixed compound or spackle into the low spot, feather it 3 to 4 inches past the dent on each side, let it dry, sand it level, and repeat with a second thin coat only when the first coat sank or the dent still reads under raking light. Deep dents take two thin coats. One thick coat shrinks, cracks at the center, and sands into a dish.
A gouge that cut or tore the paper needs a different start. Trim loose paper and lifted fibers with a utility knife so no flap stands above the surface, press the torn edge flat, and seal the exposed area before compound goes on. The sealing step stops the paper from bubbling under wet compound: brush a problem surface sealer over the exposed area, let it dry fully, then fill. After the seal dries, fill the gouge flush, feather wide, sand, and prime. Scratches that only marked paint, with no dent under a fingertip, need paint only. Filling a paint scratch adds a bump where none was needed.
How do you patch a hole up to about 4 inches wide?
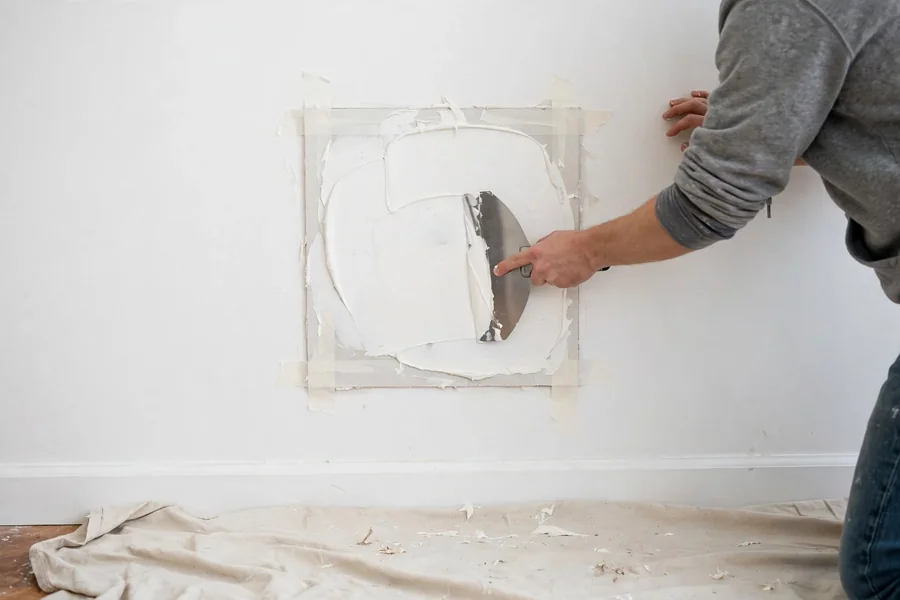
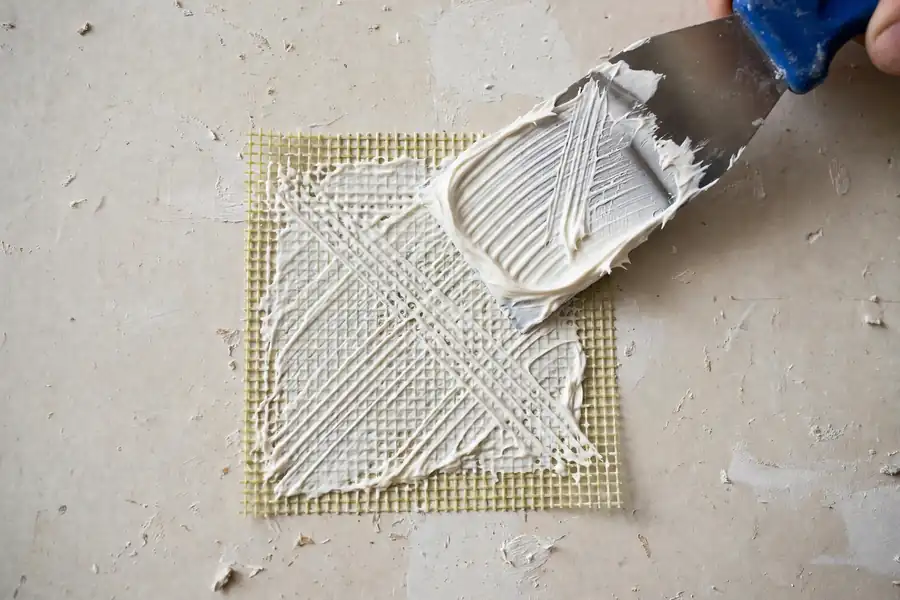
Cover the hole with a self-adhesive mesh patch, bed it in compound, and feather the edges wide. This is the standard kit repair, and the Home Depot guide read in full on October 28, 2026 describes kits built around a 4 inch by 4 inch adhesive patch. Trim loose paper and crumbled gypsum from the rim of the hole so the patch sits flat on sound board. Peel the backing and press the patch centered over the hole, with the mesh flat and no lifted corner. Spread compound over the mesh with a 6 inch knife, pressing it through the weave in a crisscross pattern so the mesh is fully wetted and no dry grid shows. Feather the edges out 2 to 3 inches past the patch. Let the coat dry fully, which can take up to 24 hours for a patch coat, then sand lightly and apply a second coat feathered wider. A third thin coat with a 10 inch or 12 inch knife finishes the patch when the mesh pattern still shows.
Use setting-type compound for the first coat over a mesh patch. Mesh tape has give in it, and ready-mixed compound shrinks as it dries, so the pair can crack along the patch edge. Setting-type compound hardens with little shrinkage and locks the mesh in place. Finish coats can be ready-mixed compound for easy sanding. Never bridge a hole with compound alone and never stuff a hole with paper, cloth, or foam and skim over it. The fill will crack, sink, or flex under paint, and the next knock will punch straight through it.
How do you patch a hole between 4 and 12 inches wide?
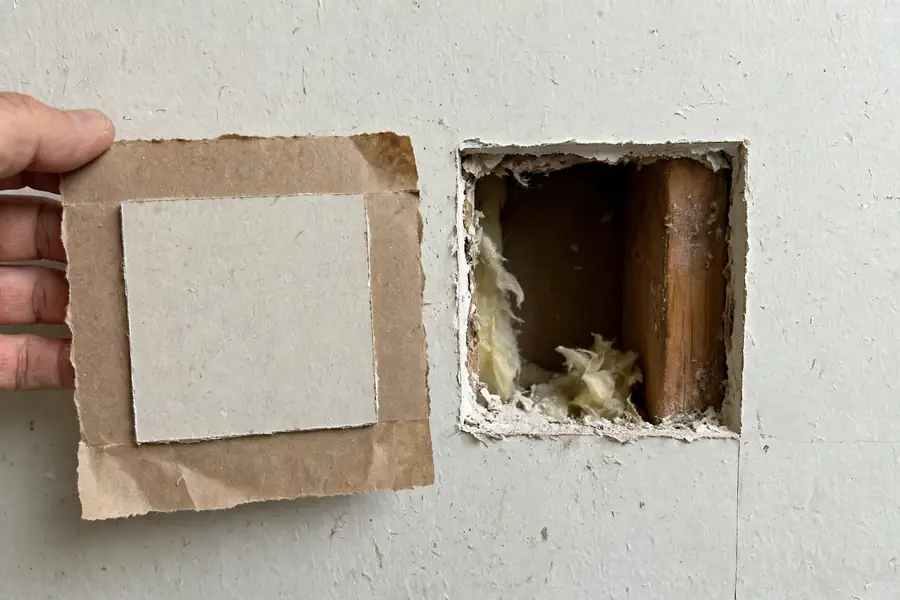
Use a California patch, also called a hot patch, for a hole in this range when no stud sits behind it. A California patch is a piece of drywall cut larger than the hole, with its back paper and gypsum trimmed away around the edges so a paper flange is left standing about 1 inch wide on all four sides. The gypsum plug fits the hole and the paper flange glues to the face of the wall, which spreads the load and leaves no raised seam to feather. Cut the hole square first, with straight edges and sound board all around. Cut the patch to match the hole plus the flange, score the back paper 1 inch in from each edge, snap the gypsum, and peel the back paper and gypsum from the flange without tearing the face paper. Butter the wall around the hole and the back of the flange with ready-mixed compound, press the plug into the hole, and smooth the flange flat with a knife, squeezing out excess compound and air. Feather compound over the flange in two coats, wider each time, and sand between coats.
A California patch suits a flat wall with firm board around the hole. It suits a ceiling less well, because gravity works against the glued flange while the compound is wet, and it suits a corner or an edge not at all, because the flange has nowhere to sit. When the hole sits over a stud, beside a corner, or in a ceiling, cut a square patch on backing instead. When the board around the hole is soft, crumbly, or wet, cut back further to firm board first. A patch glued to weak board inherits the weakness.
How to repair drywall when the hole is larger than 12 inches?
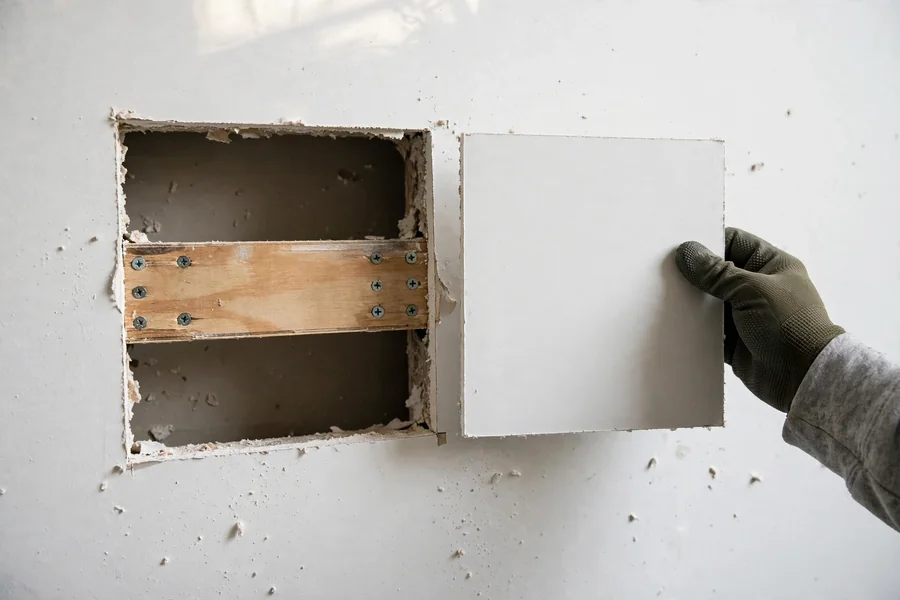
Cut the damage out to a square, screw a new piece to wood backing or to studs, tape the seams, and feather the coats wide. A 12 inch by 12 inch hole, a fist-sized hole with crushed edges, and a door knob hole that shattered the board all take this method. The cut-out patch is the strongest repair in this guide because the new board is screwed to framing or to solid backing, not glued to the face of the wall. Square the hole with a carpenter square and pencil, keeping the cut lines at least an inch past all crushed or cracked board. Find the nearest stud on each side with a stud finder. When the hole reaches a stud, center the cut on the stud so both the old board and the patch have support. When it does not reach a stud, add wood backing.
Cut backing from 3/4 inch plywood or scrap lumber, 2 to 4 inches longer than the opening, and slip it behind the wall. Hold it tight to the back of the existing board with a screw through its center as a handle, drive screws through the existing board into the backing on both sides, then remove the handle screw. For a wide opening, add backing on the top and bottom as well as the sides. Drywall clips are a sound alternative for a single patch: the clip screws to the existing board at the edge of the opening and the patch screws to the clip. Cut the patch from board of the same thickness, test the fit dry, and trim until it drops in without force. A patch forced into place bows the wall. Screw the patch to the backing or studs, keeping screws at least 1 inch from the patch edges so the gypsum does not split or crumble, and sink each head to a slight dimple without breaking the paper.
Tape every seam with paper tape or mesh tape and compound, center the tape on each joint, and coat with a 6 inch knife first, then wider knives. The Home Depot guide read in full on October 28, 2026 calls for the first coat to dry overnight, a second coat, and a third coat with a 12 inch knife for a flat finish on a large patch. Sand only when each coat is fully dry, wipe dust off before the next coat, and prime before paint. A large patch that is rushed with wet coats will show a seam line under side light for as long as the paint lasts.
How do you repair a hole in ceiling drywall?
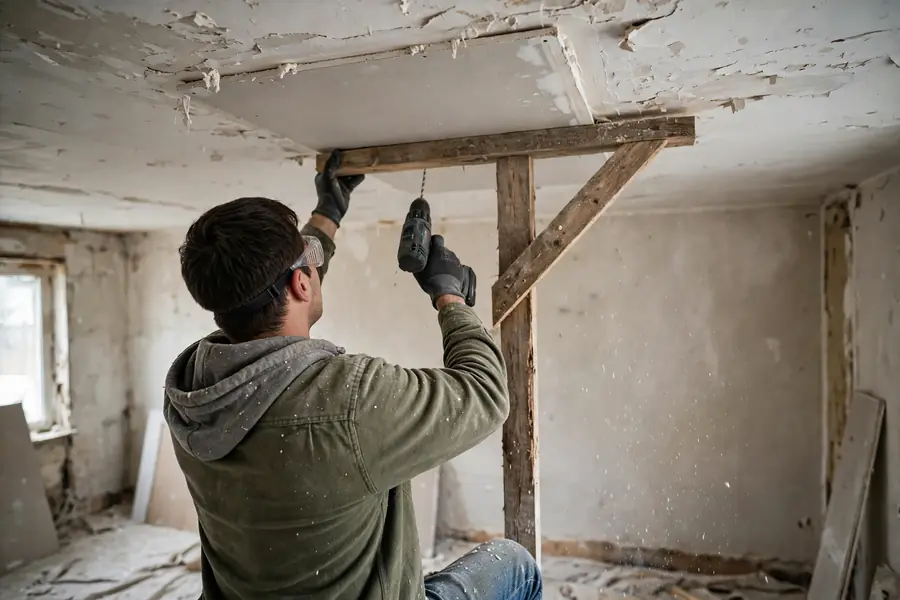
Support the patch from below while you work, use board of the right thickness, and never patch over sagging board. Ceiling work fights gravity at every step: the patch wants to fall, compound wants to sag, and a seam that looks flat from a ladder shows from the floor. Cut the patch and backing square, screw the patch to backing or joists, tape every seam, and feather the coats wide, but hold the patch in place with a T-brace made from scrap lumber, or have a second person hold it, while you drive the first screws. Screw the patch to backing or joists on all sides. A ceiling patch screwed on two sides only will flex and crack at the free edges. Keep the patch tight to the joists, with no gap behind it, and check with a straightedge that it sits flush with the surrounding ceiling before you tape.
Choose board thickness for the joist spacing. On joists spaced 24 inches on center, plan on 5/8 inch board for a ceiling patch, because 1/2 inch board can sag between wide supports over time. This follows manufacturer guidance for ceiling board summarized October 27, 2026, and the exact panel for the job should be checked against the board maker's sheet before you buy. Sag-resistant ceiling board is a maker option for wide spacing. When the ceiling itself sags between joists, bows downward, or feels soft, do not patch over it. The board has lost strength or the framing has moved, and a patch will follow the sag. Cut out the sagging section back to firm board on solid joists, check the joists for level and for water damage, and call a pro when joists are cracked, cut, or out of level by more than a small amount.
Work overhead in short sessions. Compound dries on the knife and in the pan faster when you are reaching up, so mix small batches of setting-type compound and keep ready-mixed compound covered between coats. Wear eye protection, because compound and dust fall straight down. After a leak, dry the cavity fully and confirm the leak is fixed before you close the ceiling. A ceiling patched over a slow leak will stain, soften, and fail again, and the stain will show through paint unless it is sealed with a stain-blocking primer after the board is dry.
How do you fix a hairline crack?
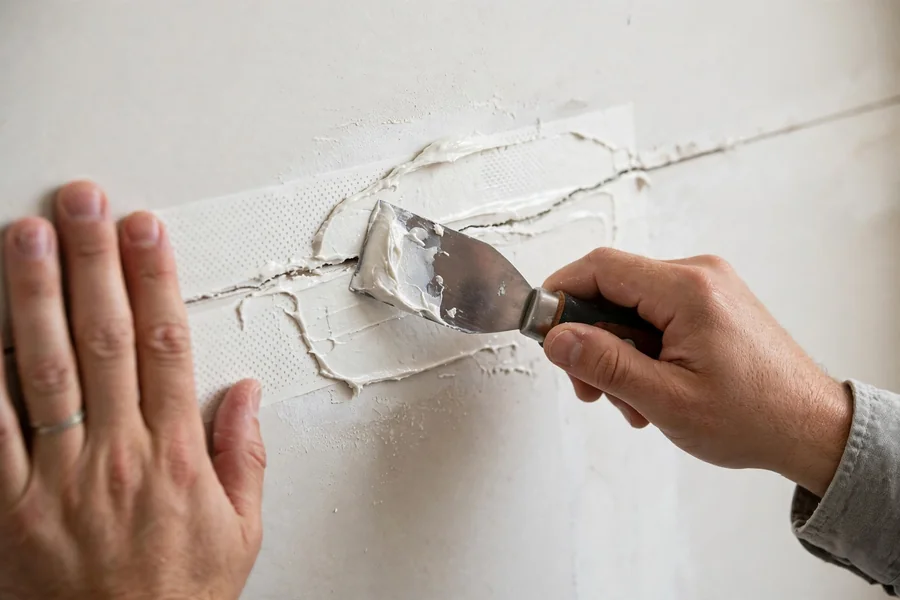
Open the crack into a shallow V, fill it, tape it, and feather the coats wide. A hairline crack is a thin line with no step between the two sides and no movement when you press beside it. It usually follows a seam, a corner, or the line above a door, where framing moves a little with the seasons. Filler alone will not hold it. The crack needs reinforcement across the line, or the same movement will split the fill again. Score along the crack with a utility knife to open a shallow V groove, brush out dust, and press compound into the groove. Bed paper tape centered over the crack in a thin coat of compound, press it flat with a knife, and wipe off excess so no ridge stands proud. Let it dry, then coat again feathered 4 to 6 inches wide, and finish with a third coat feathered wider still. Sand lightly between coats and prime before paint.
Use paper tape for a crack, not mesh tape with ready-mixed compound. Paper tape resists stretching and holds a moving joint better, while mesh tape needs setting-type compound on the first coat to gain strength, as described in National Gypsum paper tape guidance read in full on October 28, 2026. A crack wider than 1/2 inch is not a hairline crack. Cut out the failed joint, check the board edges for support, and re-tape the seam as a joint repair. A crack that runs through the middle of a board, rather than along a seam or corner, usually means the board itself flexed or was hit. Check for loose fasteners and missing backing along the crack before you tape it.
Why does a crack keep coming back, and when does it need a pro?
A crack returns when the cause keeps moving, and patching the surface cannot stop the movement. Seasonal framing movement, truss uplift in a ceiling, a missing or loose fastener, a seam with no backing, and settlement all flex a joint a fraction of an inch, which is enough to split rigid compound. The fix starts with the cause. Re-fasten loose board beside the crack, add backing where a seam floats free, and re-tape with paper tape bedded in setting-type compound for the first coat. At a wall to ceiling joint that opens in winter and closes in summer, the joint is moving with the framing, and a flexible seal at that one joint may outlast rigid tape. Do not caulk a flat wall crack and paint over it. Caulk stays soft, collects dust, and shows as a glossy line.
Call a pro when the signs point past surface movement. A crack wider than about 1/8 inch that keeps widening, a crack that steps or offsets so one side sits higher than the other, a crack paired with a sticking door or window, a sloping floor, a bowed wall, or water staining along the crack all need a structural look before any patch goes on. A crack that reappears within weeks of a careful re-tape, with fasteners tight and backing sound, also needs a second opinion. Patching it a third time wastes compound and hides a problem that is still moving. A licensed contractor or structural engineer can tell settlement that has stopped from movement that is still active, and that answer decides whether a patch will hold.
How do you fix tape that has bubbled, peeled, or come loose?
Cut out the failed tape and re-bed new tape in fresh compound. Loose tape cannot be glued back down with paint or pressed flat with a finger. The bond failed because the bedding coat was too thin, too dry, or laid over dust, and the loose section will keep lifting. Cut along both sides of the bubble or peel with a utility knife, lift the failed tape away, and scrape out loose compound underneath until you reach sound board and sound tape. Feather the edges of the old compound so the new tape has a smooth bed. Cut a piece of paper tape to length, butter the joint with compound, press the tape in centered, and smooth it with a knife from the center outward, squeezing out air and excess compound. Keep the tape fully wetted. Dry spots under tape blister again.
Treat corners and ceiling joints the same way, with paper tape folded to the angle. Mesh tape does not fold to a crisp corner and cracks more easily at an angle, so it is the wrong tape for an inside corner. After the bedding coat dries, coat again feathered wide, sand, and finish with a final thin coat. A tape repair that is coated too thick in one pass will shrink back and leave a hollow over the joint. Two thin coats beat one thick coat every time. When tape keeps failing along a whole seam, check the board edges. A seam with a gap wider than about 1/4 inch, or a seam with no backing behind it, needs the gap filled and the board supported before new tape goes on.
How do you fix nail pops and screw pops?
Drive a new screw beside the pop, set the old fastener below the surface, and fill both spots. A pop is a fastener head pushing the board and compound outward, usually because the framing shrank, the fastener missed the stud, or the board was never pulled tight. Do not hammer a popped nail flat and skim over it. It will pop again. Drive a drywall screw 1 to 2 inches above or below the popped nail, per the Home Depot guide read in full on October 28, 2026, sinking the head to a slight dimple that pulls the board tight to the stud. Then tap the popped nail back below the surface with a hammer, or drive the popped screw in until it dimples, taking care not to break the paper. When a popped screw spins freely, it missed the framing or stripped out. Leave it set below the surface, drive two new screws into solid framing on either side, and fill all three spots.
Fill the dimples with compound, let it dry, sand, and fill again if the fill sank. Pops often appear in a line along a stud, because the same shrinkage moved the whole row. Fix the full row, not only the worst bump, and check the ceiling and the opposite wall for the same pattern. A single pop is a small repair. A dozen pops across a ceiling, or pops paired with sagging board, point to framing movement or board that was never fastened well, and a pro should look at the framing before the ceiling is skimmed and painted.
How do you repair an inside corner?
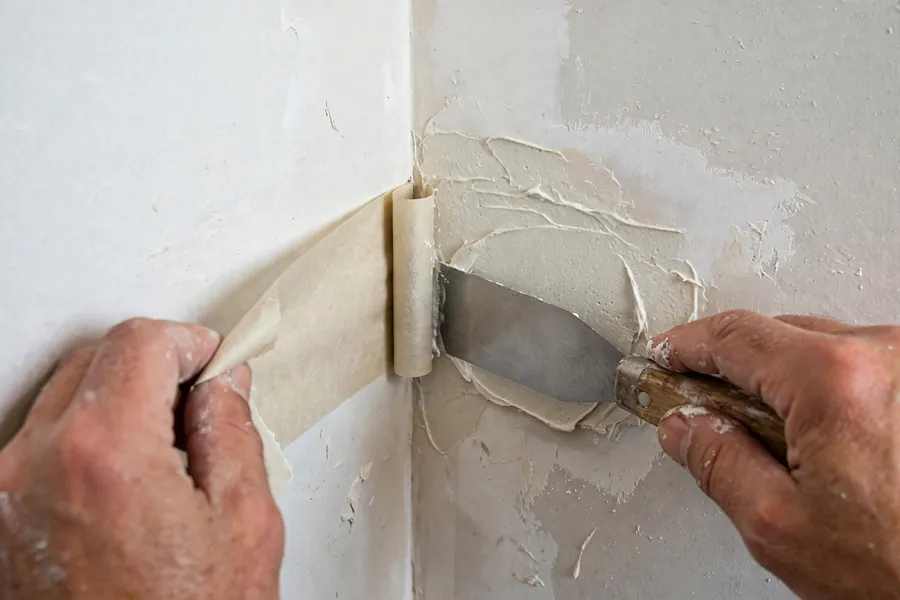
Re-tape the corner with paper tape folded to the angle, bedding one side at a time. Inside corners crack because two boards meet at an angle that moves, and the tape must bridge the angle without bridging over a hollow. Cut out failed tape and loose compound, clean the corner to sound board, and check that both boards are screwed tight near the corner. A board that flexes at the corner will crack any tape laid over it. Fold a strip of paper tape down its center crease, butter one side of the corner with compound, press one half of the tape into place, then butter the other side and press the second half in. Smooth each side with a knife held at a slight angle, working from the corner outward, and wipe off excess so the tape sits tight in the angle with no air under it.
Coat one side, let it dry, then coat the other side. Coating both sides wet in one pass drags compound out of the corner and leaves a hollow. Feather each coat 4 to 6 inches out from the corner, sand lightly between coats, and keep the corner line sharp. A rounded corner reads as sloppy from across the room, while a sharp corner with a thin coat reads as new work. Do not run mesh tape into an inside corner. It will not crease cleanly, it will not sit tight in the angle, and it will crack along the fold. Paper tape is the tape for corners, in new work and in repair alike.
How do you repair an outside corner and damaged corner bead?
Replace a crushed or bent bead, re-fasten a loose bead, and feather compound wide on both faces. An outside corner takes every knock in a house, from furniture, vacuum cleaners, and feet, and the metal or paper-faced bead under the compound is what keeps the edge straight. A small dent in the bead can be filled and feathered. A bead that is bent, crushed, rusted, or pulled away from the board cannot be filled straight. Cut out the damaged length with a utility knife and tin snips, back to sound bead, and fit a new bead of the same type and length. Screw or nail the new bead through its flange into framing or solid board, keeping fasteners back from the nose of the bead so they do not dent it. Paper-faced bead beds in compound like paper tape and resists hairline cracks at the flange. Metal bead fastens mechanically and suits a corner that takes hard knocks.
Coat both faces of the corner, feathering 6 to 8 inches out on each side, and keep the nose of the bead just proud of the compound so the edge stays crisp. Sand with a block held flat to one face at a time, never across the nose, or the edge will round over. Check the corner with a straightedge along each face before paint. A corner that waves will catch light and show every coat. When a corner is dented along its full height, or the bead has pulled away from the board for several feet, replace the full length in one piece. Short patches of bead leave a joint in the most visible line in the room.
How do you repair torn facing paper and exposed brown gypsum?
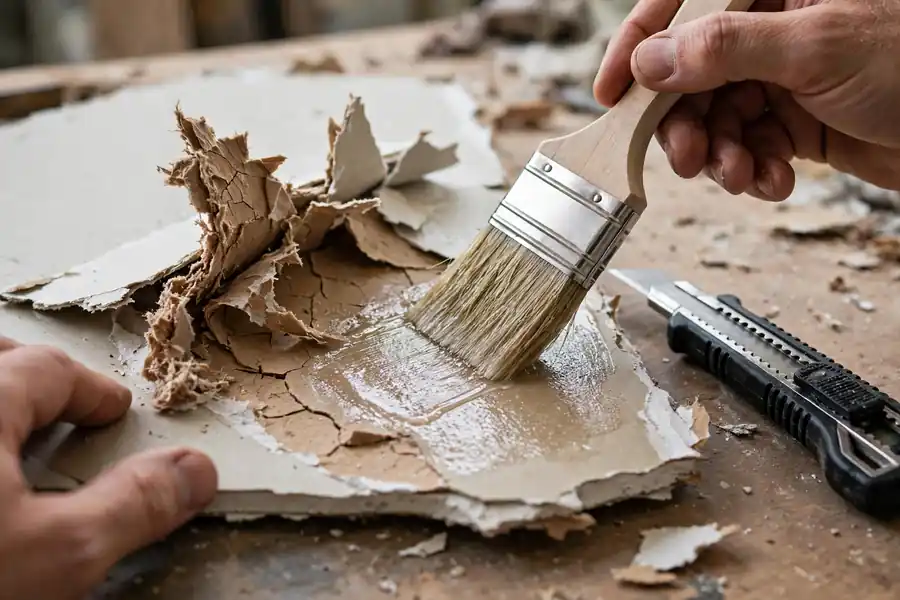
Seal the torn paper before any compound touches it, then skim the area flat. Torn facing paper is the damage left by wallpaper removal, tile removal, a mirror pulled off the wall, or a patch cut carelessly. The paper face is the working surface of drywall. Once it tears, the fibers lift, the brown gypsum core shows, and wet compound soaks into the loose fibers and bubbles them up. Compound laid straight onto torn paper will blister, and paint laid over unsealed brown gypsum will soak in unevenly and flash. Trim loose paper and lifted fibers with a utility knife and sand the area gently to remove fuzz, taking care not to gouge the gypsum. Brush or roll a problem surface sealer over the torn area and a little past its edges, and let it dry fully.
Zinsser Gardz problem surface sealer is made for this job. Rust-Oleum technical data for Gardz read October 27, 2026 states that it penetrates and seals damaged facing paper, prevents bubbles when damaged drywall is skim coated, and dries to a firm, clear, moisture resistant film. Follow the container directions for dry time before you skim. Skim the sealed area with a thin coat of ready-mixed compound, feathering past the repair, let it dry, sand lightly, and skim again when the surface still shows a step or a hollow. Seal the skimmed repair with primer before paint. A shellac-based or oil-based sealer is the stronger choice when the tear is deep, the paper is badly lifted, or the gypsum itself is soft and crumbly. When the gypsum is crushed, powdery, or more than about 1/4 inch below the surrounding surface, cut the section out and patch it. No sealer rebuilds crushed gypsum.
How do you repair drywall that got wet?
Dry the wall and the cavity first, cut out board that stays soft or swollen, and replace it with board suited to the room. Wet drywall does not dry back to full strength. The gypsum core softens, the paper face loses bond, and the board sags between fasteners. A stain alone, on board that feels firm and dry, can be sealed and painted. Board that stays soft, swollen, delaminated, or bowed after drying must come out. Find and fix the leak first, whether it is a pipe, a roof flashing, a window, or a tub surround. Open the wall enough to see framing and insulation, remove wet insulation, and dry the cavity with air movement and dehumidification until framing reads dry. Patching over a damp cavity traps moisture and grows mold behind the new board.
Cut back to dry, firm board on all sides, past every soft or stained section, and cut the replacement from board suited to the spot. Standard board suits a dry wall. A bathroom wall, a laundry wall, or a wall that sees regular splashing takes moisture resistant board, and a shower or tub surround takes a tile backer rated for wet areas, not standard drywall. Tape every seam with tape centered on each joint, coat in three thin passes each wider than the last, sand when dry, and prime before paint, and seal any remaining water stain with a stain-blocking primer after the board is fully dry. Stain-blocking primer goes on dry board only. Paint or primer laid over damp board peels. When water came from sewage, a flood, or a leak that ran for weeks, stop and bring in a pro. Contaminated water and long-term saturation need cleaning and drying beyond a homeowner patch, and insulation and framing may need work too.
How do you repair moldy drywall?
Cut out moldy porous board and replace it, fix the moisture that fed it, and keep the work area contained. Mold on drywall is not a surface stain to scrub away. Drywall is porous, and growth reaches into the paper and the gypsum core, so cleaning the face leaves growth inside the board. Board that is moldy, soft, or wet through must be cut out and bagged for disposal. Board with a small mold patch on firm, painted, dry board can be cleaned, but only after the water source is fixed. The US Environmental Protection Agency mold guidance summarized October 27, 2026 states that the water problem must be fixed first, that porous materials such as drywall may have to be thrown away when moldy, and that moldy surfaces must be cleaned and dried before painting, never painted over.
Use the size of the moldy area to decide who does the work. The EPA Mold Course, Chapter 6, read in full on October 28, 2026, sets minimum protective gear, gloves, goggles, and an N-95 respirator, for cleanup of a small area of less than 10 square feet in total. The same chapter describes limited containment for areas of 10 to 100 square feet and full containment above 100 square feet. Treat about 10 square feet, roughly a 3 foot by 3 foot patch, as the line where a homeowner job ends and a pro job begins, and bring in a pro sooner when mold sits in a wall cavity, near ductwork, or in a home with asthma, allergies, or immune sensitivity in the household. Never mix bleach with ammonia cleaners, never run a fan that blows spores through the house, and never dry-sand moldy board. Cut the board out in the largest pieces the opening allows, bag it at the work area, HEPA vacuum the cavity, and let framing dry fully before new board goes in. Do not diagnose health effects from color or smell. Color does not identify a species, and no color tells you whether growth is dangerous.
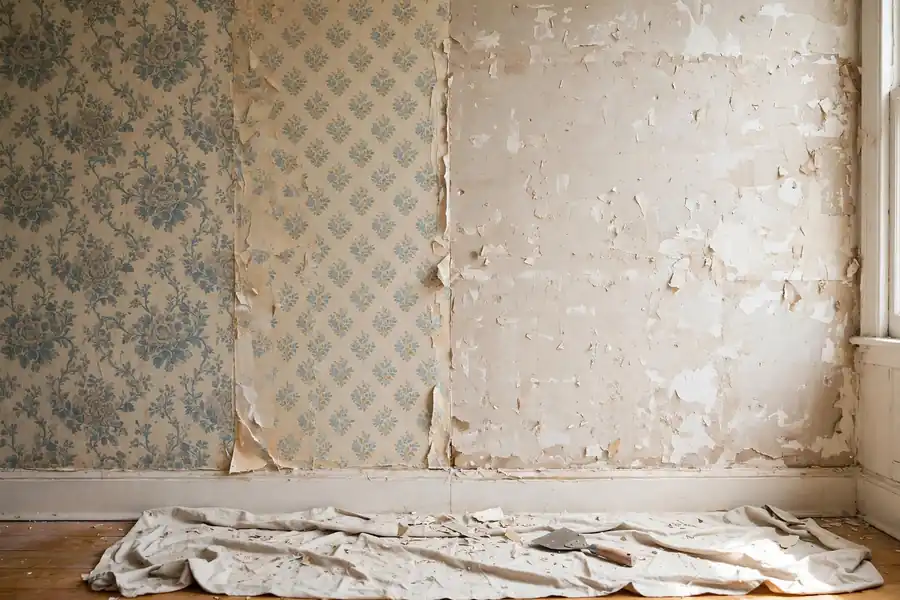
How do you repair drywall after wallpaper, tile, or mirror removal?
Seal the torn paper, skim the wall flat, and prime before any new finish goes on. Removal damage is torn paper and glue residue, not holes, and the fix is surface work, not a patch. Wallpaper removal tears facing paper in strips, tile removal pulls paper and compound off with the tile, and a glued mirror pulls chunks of paper and gypsum when it comes off. Start by removing all loose material: glue residue, tile adhesive ridges, mirror mastic, and lifted paper. Wash glue residue off with warm water and a sponge, changing the water often, until the wall feels clean and not slick. Glue left on the wall reactivates under paint and texture, and it will crack and peel the new finish. Let the wall dry fully, trim torn paper, sand off fuzz, and seal the whole damaged area with a problem surface sealer that dries to a firm, clear film. Skim the wall with thin coats of compound, feathering wide, until the surface reads flat under raking light.
Check the wall for flatness before you prime. Removal damage hides low spots and adhesive ridges that paint will not hide. Run a straightedge and a work light across the wall, mark every hollow and ridge, and skim again where the light shows a step. Prime the skimmed wall with drywall primer, and use a stain-blocking primer on any water stain or adhesive stain that shows through. Where tile removal took the board down to brown gypsum over a wide area, or the gypsum is gouged deep, cut that section out and patch it rather than building it up with coat after coat of compound. Thick compound over a wide area shrinks, cracks, and sands into waves. A new piece of board, taped and feathered, gives a flatter wall in less time.
How do you coat, sand, and prime a patch so it stays flat?
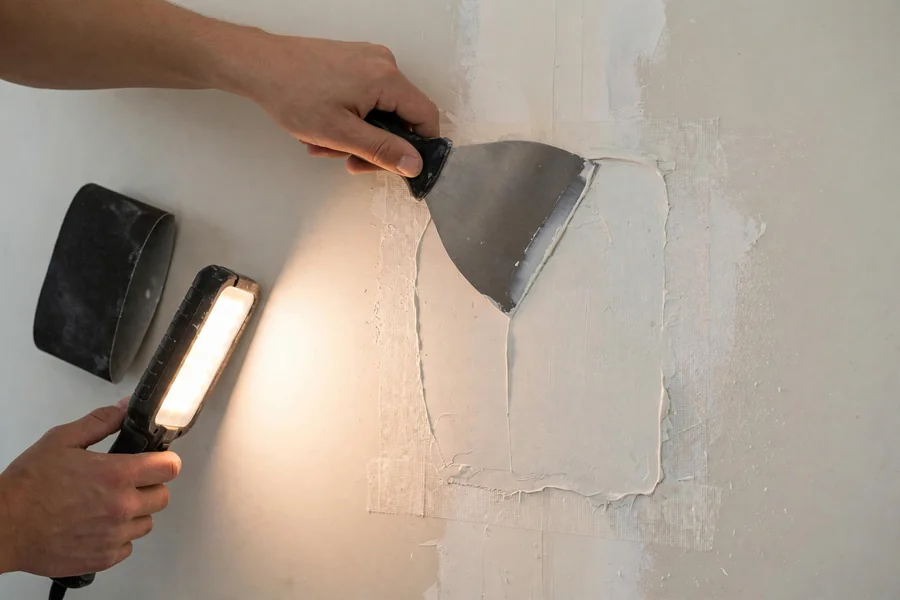
Coat in three thin passes, each wider than the last, sand only when dry, and prime the bare compound before paint. The coat sequence is what makes a patch disappear. The first coat beds the tape and fills the joint. The second coat, called the fill coat, levels the joint and starts the feather. The third coat, called the finish coat, feathers the repair into the surrounding wall so no edge catches light. Use a 6 inch knife for the first coat, a 10 inch knife for the second, and a 12 inch knife for the third, widening each coat 2 to 4 inches past the last. Keep each coat thin. A thick coat shrinks back, cracks at the center, and sands into a hollow that needs another coat to fix. Wipe the knife clean often, and scrape ridges and lap marks off while the coat is still workable.
Sand with a block, not with fingertips, and sand only fully dry compound. Fingertips press harder in the middle and dish the patch. A block keeps pressure even. Start with 120 grit paper to level ridges, finish with 150 grit paper for a flat surface that takes primer evenly, and wipe dust off with a damp cloth or tack cloth before the next coat and before primer. Sand in good light, with a work light held low against the wall, so ridges show as shadows before paint locks them in. Wear a dust mask and seal the room, because sanding dust is fine and settles everywhere. Prime every inch of bare compound and bare board with drywall primer, and let it dry fully. Paint laid straight onto compound soaks in at a different rate than paint on the old wall, and the patch shows as a dull rectangle, a fault painters call flashing. Two coats of paint over primer, with the first coat dry before the second, blend the repair better than one heavy coat.
The finish standard behind this sequence is the Gypsum Association GA-214 levels of finish, summarized October 27, 2026. Level 4, tape plus two coats with a thin skim over fasteners, is the usual standard for flat paint on a home wall. Level 5 adds a thin skim coat over the whole surface and suits gloss paint, dark colors, and walls hit by strong side light from a window. A single patch rarely needs a full Level 5 skim, but a patch on a wall with gloss paint or harsh side light may need a wider feather and a skim over the patch to match the surrounding surface. Agree the standard with a painter before a whole room is skimmed, because the two levels differ in labor and cost.
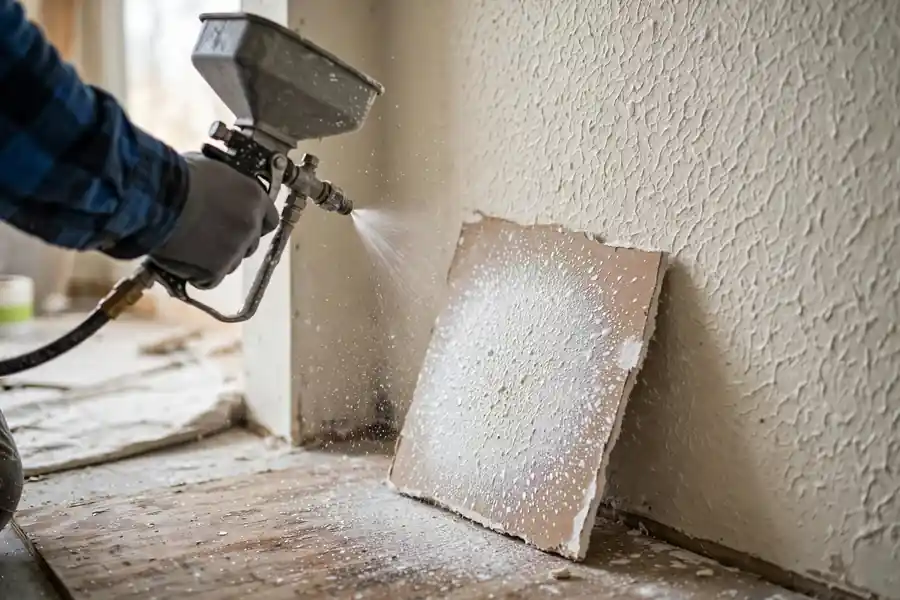
How do you match orange peel and knockdown texture?
Test the texture on scrap board first, spray it to match the surrounding pattern, and feather it past the patch. Texture is the step that gives most patches away. A patch sanded flat on a textured wall reads as a bald spot, even when the seams are perfect. Identify the pattern before you buy anything. Orange peel is a fine, even spatter like the skin of an orange. Knockdown is a heavier spatter flattened on top, leaving flat-topped blobs. Skip trowel and hand textures are troweled by hand and need a trowel, not a spray. For spray textures, thin ready-mixed compound or premixed texture to a loose, pourable consistency, and spray a test patch on scrap drywall or cardboard. Change the nozzle, the pressure, and the distance until the spatter size and density match the wall beside the repair, checking the test under the same light as the wall.
Spray the patch in light, overlapping passes, starting outside the patch and moving in, so the new texture feathers into the old with no hard edge. Hold the gun or can at a steady distance and keep it moving. Pausing in one spot piles material into a heavy blotch. For knockdown, let the sprayed texture lose its wet sheen and turn tacky, several minutes in normal room conditions, then draw a wide, clean knife lightly over the tops at a shallow angle to flatten them, cleaning the blade every few passes. Knocking down too soon smears the texture. Waiting too long leaves hard peaks that will not flatten. Practice the timing on scrap board first, because the window is short and the wall will not wait. Let texture dry fully, prime it, and paint it. Texture that is painted while damp can soften and slide, and unprimed texture drinks paint unevenly. When the texture is popcorn, skip trowel, or a heavy hand pattern across a whole ceiling, or when the patch sits in the middle of a large textured ceiling, a pro with a hopper gun will match it faster and with less overspray than a first attempt with a can.
How long does a repair take to dry, and when can you paint?
Wait until each coat is dry through, not only dry on the surface, and paint only after primer has dried. Drying time is set by coat thickness, compound type, temperature, humidity, and air movement, so a clock reading from another house will mislead you. Ready-mixed compound turns from dark gray or tan to white as it dries, and it must be white and firm all the way through before you sand it. Sanding damp compound tears it, clogs paper, and leaves a rough surface that needs another coat. Setting-type compound is ready to recoat once it has set hard and cooled. A thin spackle fill dries in 15 to 30 minutes. A patch coat of ready-mixed compound needs overnight in most rooms. A thick fill, a cold room, or a damp basement can double those times.
| Stage | Usual wait | Check before the next step |
|---|---|---|
| Thin spackle fill | 15 to 30 minutes | Fill is firm, no soft center under a fingernail |
| Setting-type first coat, 20 minute grade | 20 to 30 minutes to set | Coat is hard and cool to the touch |
| Setting-type first coat, 45 minute grade | 30 to 80 minutes to set | Coat is hard and cool to the touch |
| Setting-type first coat, 90 minute grade | 85 to 130 minutes to set | Coat is hard and cool to the touch |
| Ready-mixed patch coat | Overnight | Coat is white through, firm, and cool |
| Skim coat, thin | Several hours to overnight | No dark damp patches, no cool damp feel |
| Problem surface sealer | Per the container, commonly about 3 hours to recoat | Sealer is dry and clear |
| Drywall primer | Per the container, commonly 1 hour to recoat | Primer is dry and even, no tacky spots |
| Texture | Until fully dry, commonly overnight | Texture is firm and dry to the touch |
Speed up drying with warm air, low humidity, and gentle air movement, not with a heat gun aimed at the patch. Direct heat cracks compound and bubbles tape. Open a window and run a fan in the room, not blowing straight at the wall, when the weather allows. A repair that must be painted the same day should be built with setting-type compound for the first coats and ready-mixed compound only for a thin finish coat, with each coat checked dry before the next goes on. Rushing a wet coat under paint traps moisture, and the paint will peel in sheets over the patch.
Should you do it yourself or hire a pro?
Do the repair yourself when the damage is small, dry, and stable, and hire a pro when it is large, wet, moldy, structural, or on a ceiling that sags. Most homeowners can learn how to repair drywall for nail holes, small patches, hairline cracks, loose tape, and pops with basic tools and a weekend of drying time. The work rewards patience more than strength: thin coats, full drying, and a sharp knife matter more than speed. Hire a pro when the hole spans several studs, the ceiling sags or the board is soft overhead, water or mold covers more than about 10 square feet, the crack signals movement, the wall holds lead paint and paid work crosses the rule threshold, or the finish is a gloss wall in strong side light that will show every seam. A pro also earns their fee on texture matching across a large ceiling, on a full wall skim, and on any repair where the cause is still unknown.
Cost bands below come from Angi, updated September 24, 2026, from 36,945 verified projects, read in full on October 28, 2026. They are project averages, not quotes, and local labor, texture, and paint change the number. Use them to judge whether a quote sits in a sane range, not to price a job yourself.
| Job | Angi 2026 band |
|---|---|
| Pro repair, most homeowners | 296 dollars to 930 dollars, average 613 dollars |
| Small hole, DIY kit | 10 dollars to 30 dollars for materials |
| Large ceiling repair | Up to 1,300 dollars |
| Pro pricing basis | 50 dollars to 75 dollars per square foot, or 60 dollars to 90 dollars per hour |
Get a written scope before work starts: the cause fixed, the board type, the number of coats, texture matching, priming, and paint included or excluded, and who hauls debris away. A quote that prices only the patch and leaves texture, primer, and paint out will grow. A quote that includes a return visit for a second coat and a texture check under the room's own light is worth more than a lower number that ends at the first coat. Keep the leftover paint, the compound type, and the board thickness on record for the next repair. The next hole will be easier when the last repair left a note behind.
Quick answers to common questions
Can you patch drywall without cutting a new piece?
Yes, for holes up to about 4 inches wide, with a self-adhesive mesh patch bedded in compound. Larger holes need a cut-out piece of board screwed to backing or studs, because filler and mesh alone have no strength across a wide opening.
Can you use spackle for a large hole?
No. Spackle is a thin filler for nail holes and shallow dents. It shrinks, cracks, and has no strength across an open hole. A large hole needs a patch of board, tape, and joint compound in thin coats.
How many coats of joint compound does a patch need?
Three thin coats: a tape coat that beds the tape, a fill coat that levels the joint, and a finish coat feathered wider than the last. Each coat must dry fully before the next goes on, and the last coat is sanded and primed before paint.
Can you paint directly over joint compound?
No. Bare compound absorbs paint at a different rate than the surrounding wall and shows as a dull patch, a fault called flashing. Prime all bare compound and bare board with drywall primer, let it dry, then paint.
How do you stop a crack from coming back?
Fix the cause, re-fasten loose board, add backing where a seam floats free, and re-tape with paper tape bedded in compound. A crack that returns after a careful re-tape, keeps widening, or pairs with a sticking door needs a pro to check for movement before it is patched again.